ridestp
New member
- Location
- Petoskey, MI
Because my 2016 Golf R has keyless entry and push to start, my key fob never comes out of my pocket when I leave the house. That, combined with the fact that I do not carry any other keys, led me to figure out how I could fit the guts of the fob into my wallet.
The first step was disassembly of the fob. After popping off the battery cover, there was a single screw. Once removed, the metal key ring came off, and also allowed the rounded side piece to come off as well. At this point, I had to resort to prying to get the fob apart. I am not sure how it was bonded together, but it was a little nerve wracking and took a solid 20 minutes of work to get it completely open. At this point, it will still go back together, but is not nearly as solid as it once was.
You can see that the circuit board is quite small when compared with the size of the fob. Minus the battery holder clips, it is 5.3mm thick at its thickest point. The end result is 5.9mm thick, meaning my case adds only 0.6mm.
I designed the case in Autodesk Fusion 360, used Repetier Host and Slic3r to manage the print, and printed on the Printrbot Simple Maker 2014 3D printer using PLA. After just a couple prototypes I ended up with the version I will be using.
You will notice one side of the case has a white square on it. That is the LED from the fob. It stands 1mm taller than any other part on that side of the circuit board, so by adding a hole and making the case 1mm thick, it is flush with the outside of the case, allows the LED to still function, and makes the case 1mm thinner than it would have been.
The end results in numbers: The fob weighs 62g, the wallet case is 20g. The fob is 16.39mm thick, the wallet case is 5.90mm thick. For comparison, 5 credit cards (at the raised numbers) are 6.31mm thick.
The obvious tradeoff is the lack of access to the buttons. However, I have never personally needed to use the buttons (though I know others would say it’s a must.) I know I could modify this to still make use of the buttons if I wanted to.
I just wanted to share my fun little weekend hackery!
A few pics. Link to full album: http://imgur.com/a/iwPPi

Completed, interior

Completed, bottom. You will notice the white square on it. That is the LED from the fob. It stands 1mm taller than any other part on that side of the circuit board, so by adding a hole and making the case 1mm thick, it is flush with the outside of the case, allows the LED to still function, and makes the case 1mm thinner than it would have been.
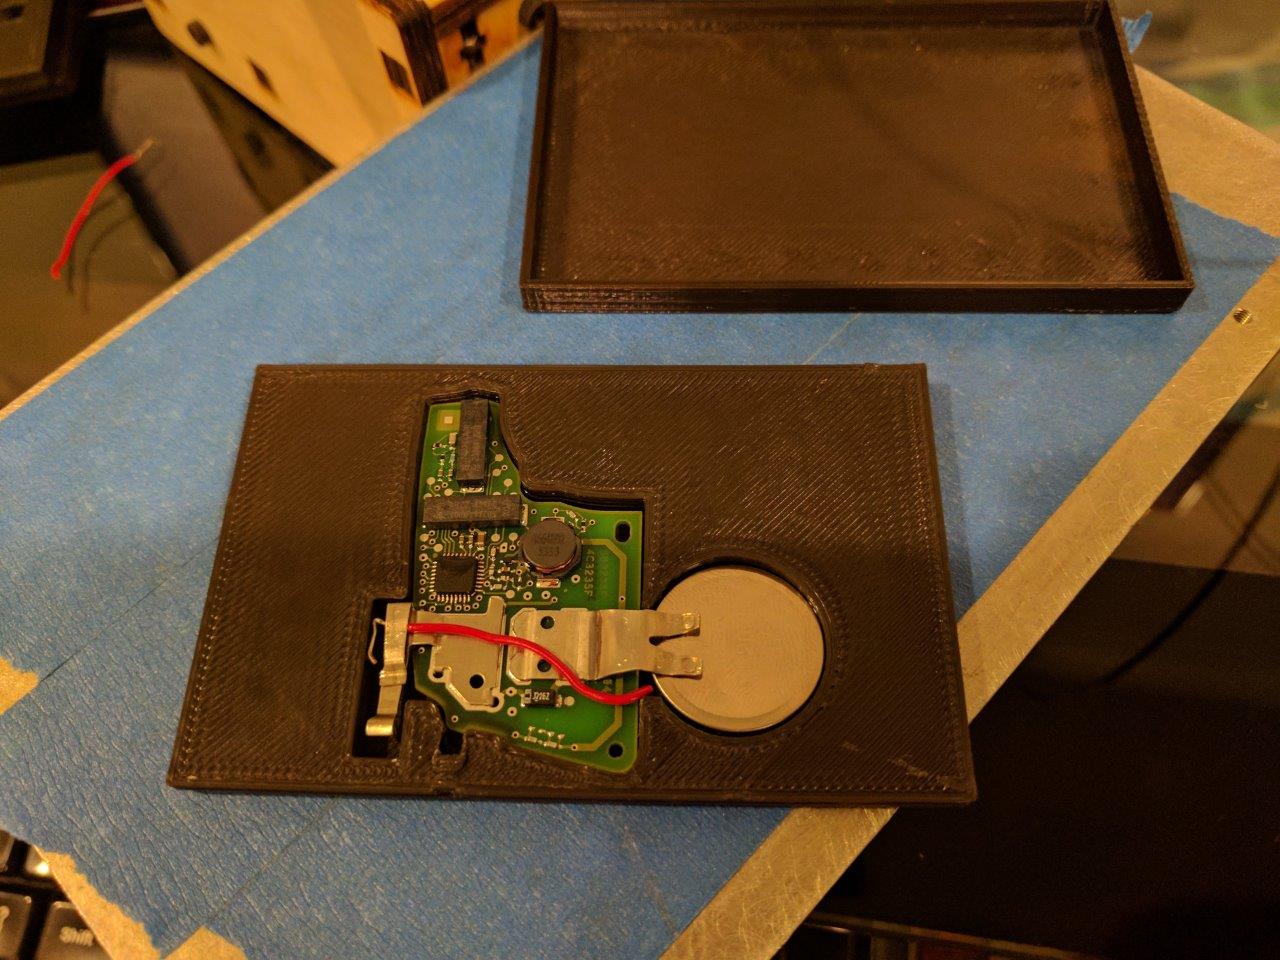
Completed, interior, with lid above

You can see here how the battery attaches - The metal tabs touch one side of the battery and the wire touches the bottom.

The wallet case is 5.90mm thick

The fob is 16.39mm thick
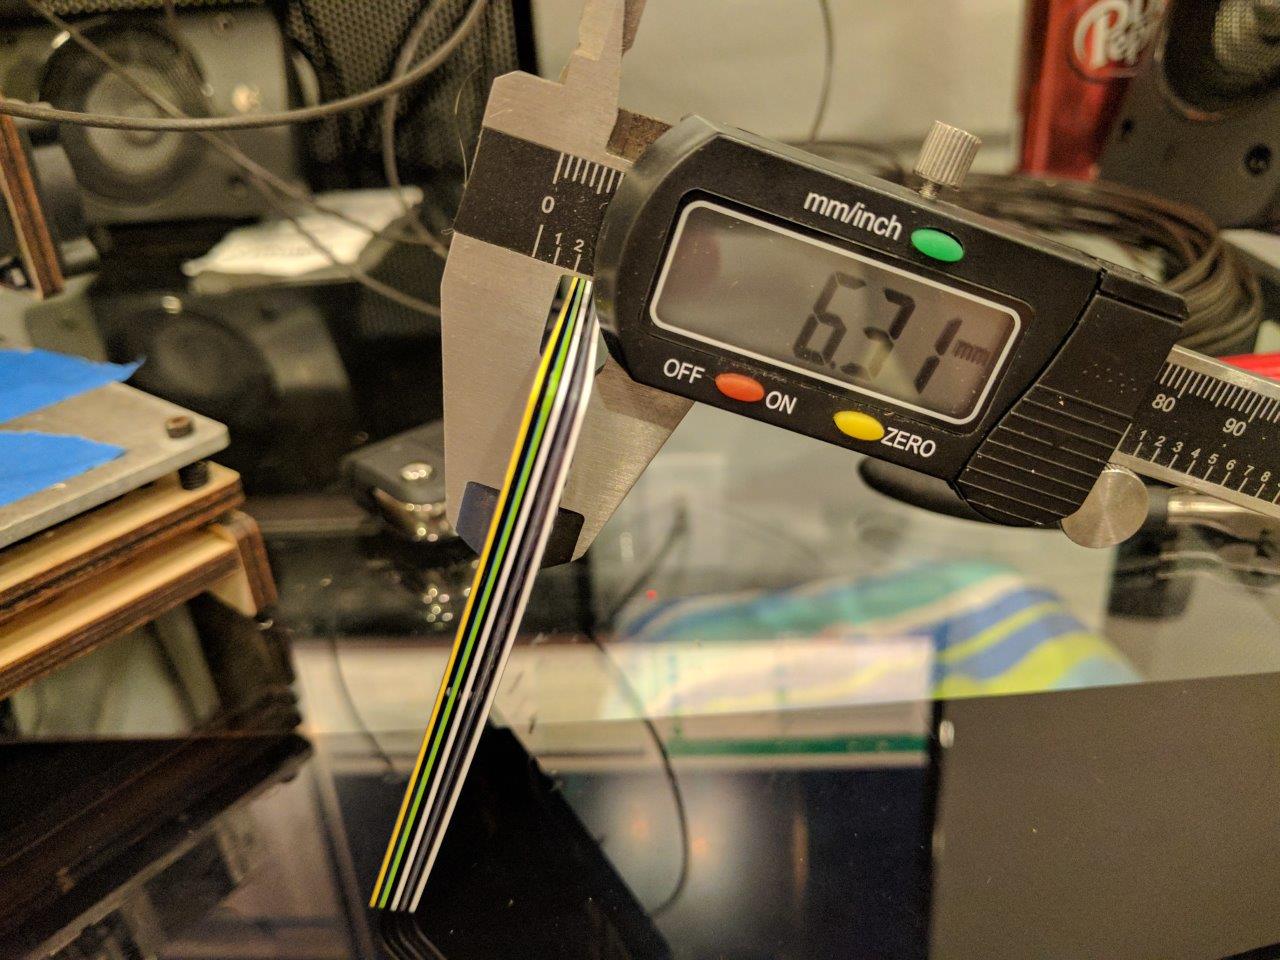
5 credit cards are 6.31mm thick at the numbers, for comparison

The wallet case weighs 20g

The fob weighs 62g

Mid-print
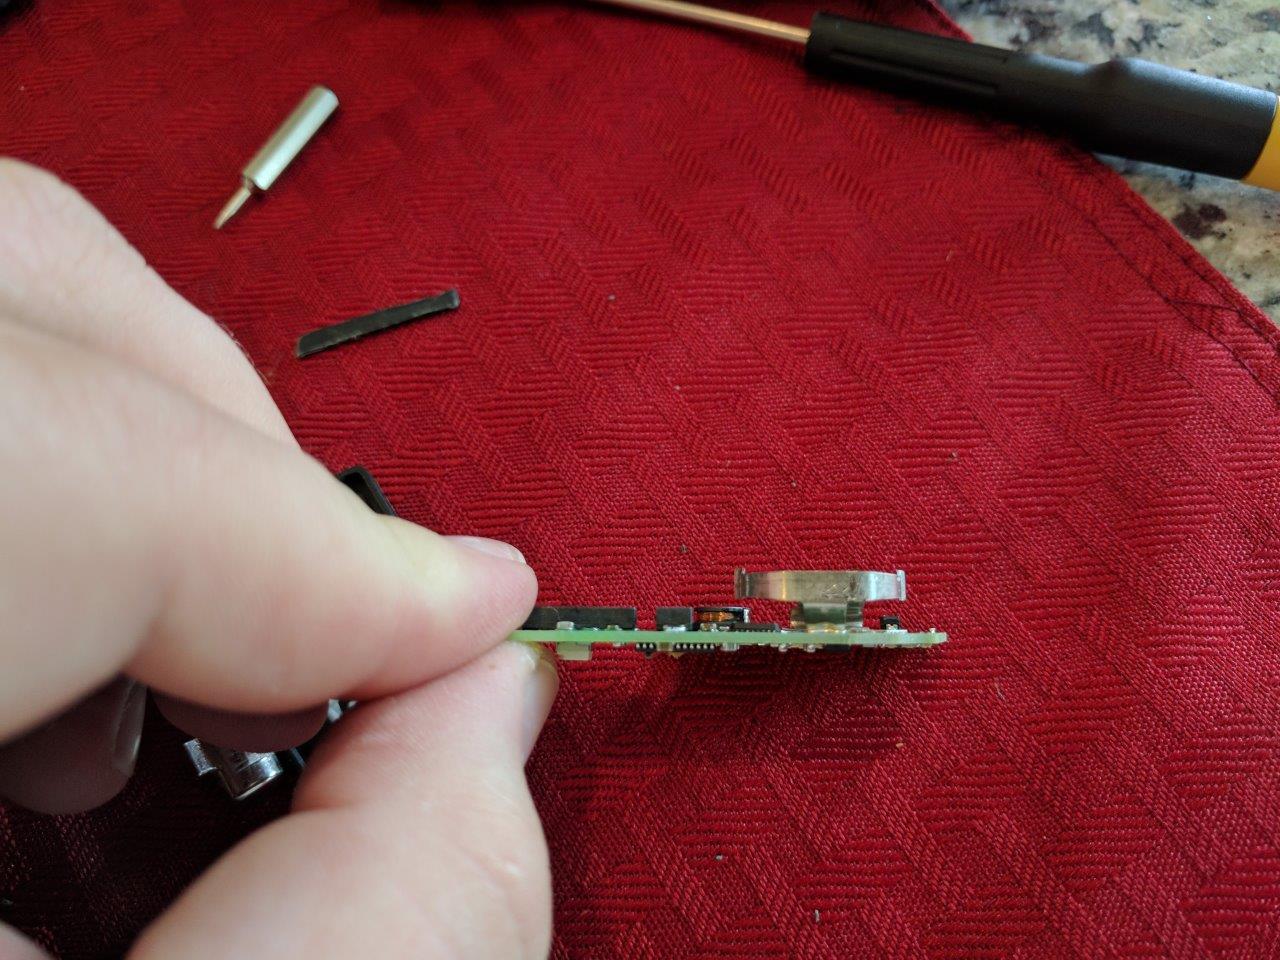
The circuit board. The battery clip is the tallest part, and was ultimately squashed down.
Link to full album: http://imgur.com/a/iwPPi
The first step was disassembly of the fob. After popping off the battery cover, there was a single screw. Once removed, the metal key ring came off, and also allowed the rounded side piece to come off as well. At this point, I had to resort to prying to get the fob apart. I am not sure how it was bonded together, but it was a little nerve wracking and took a solid 20 minutes of work to get it completely open. At this point, it will still go back together, but is not nearly as solid as it once was.
You can see that the circuit board is quite small when compared with the size of the fob. Minus the battery holder clips, it is 5.3mm thick at its thickest point. The end result is 5.9mm thick, meaning my case adds only 0.6mm.
I designed the case in Autodesk Fusion 360, used Repetier Host and Slic3r to manage the print, and printed on the Printrbot Simple Maker 2014 3D printer using PLA. After just a couple prototypes I ended up with the version I will be using.
You will notice one side of the case has a white square on it. That is the LED from the fob. It stands 1mm taller than any other part on that side of the circuit board, so by adding a hole and making the case 1mm thick, it is flush with the outside of the case, allows the LED to still function, and makes the case 1mm thinner than it would have been.
The end results in numbers: The fob weighs 62g, the wallet case is 20g. The fob is 16.39mm thick, the wallet case is 5.90mm thick. For comparison, 5 credit cards (at the raised numbers) are 6.31mm thick.
The obvious tradeoff is the lack of access to the buttons. However, I have never personally needed to use the buttons (though I know others would say it’s a must.) I know I could modify this to still make use of the buttons if I wanted to.
I just wanted to share my fun little weekend hackery!
A few pics. Link to full album: http://imgur.com/a/iwPPi
Completed, interior
Completed, bottom. You will notice the white square on it. That is the LED from the fob. It stands 1mm taller than any other part on that side of the circuit board, so by adding a hole and making the case 1mm thick, it is flush with the outside of the case, allows the LED to still function, and makes the case 1mm thinner than it would have been.
Completed, interior, with lid above
You can see here how the battery attaches - The metal tabs touch one side of the battery and the wire touches the bottom.
The wallet case is 5.90mm thick
The fob is 16.39mm thick
5 credit cards are 6.31mm thick at the numbers, for comparison
The wallet case weighs 20g
The fob weighs 62g
Mid-print
The circuit board. The battery clip is the tallest part, and was ultimately squashed down.
Link to full album: http://imgur.com/a/iwPPi
