I installed my Helix Soundbox subwoofer this week and gleaned this forum and the internet for helpful installation videos and other websites, I decided to consolidate everything I found to assist others and hope this will be helpful!
-Gar
____________________________________
ITEMS NEEDED BEFORE INSTALLING THE HELIX SUB:
ORDER: 1T0803899B - Longer mount bolt to replace short spare wheel lock-down (around $10)
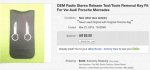
ORDER: VW Radio removal keys (around $2 - $5)
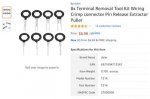
ORDER: VW Pin Removal tool set (around $5 - $7)
ORDER: Door sill removal tools (helpful, but not necessary - around $4)
RENT: DKS051419A - Programming Dongle (Rental available on golfmk7.com or possibly at local dealer)
___________________________
BEST HELIX INSTALLATION VIDEOS:
These two YouTube videos were SO HELPFUL, I didn’t even use the confusing Helix installation manual! They are for the Golf R, but work exactly the same for the GTI:
Part #1:
https://www.youtube.com/watch?v=6dKJtnaV9CU
Part #2:
https://www.youtube.com/watch?v=59bKOruoJys&feature=youtu.be
___________________________
OTHER HELPFUL & INFORMATIVE LINKS:
Scott’s great installation advice:
https://stealthgti.com/2017/01/25/helix-sound-upgrade/comment-page-1/#comment-1293
Scott’s installation video:
https://www.youtube.com/watch?v=d7Wz-x0n7TA&feature=youtu.be
Good installation photos:
https://imgur.com/a/ulwL6Z0
Dropping the glove box:
https://www.autoinstruct.com.au/manufacturer/volkswagen/mk7-golf/changing-cabin-pollen-filter-mk7/
Removing Infotainment unit:
https://www.autoinstruct.com.au/manufacturer/volkswagen/mk7-golf/mk7-golf-glovebox-headunit-removal/
Sill Panel Trim Removal:
https://www.autoinstruct.com.au/manufacturer/volkswagen/mk7-golf/mk7-golf-sill-panel-trim-removal/
Rear seat bottom removal:
https://www.youtube.com/watch?v=pMaWQ5aalLY
___________________________
HOW TO PROGRAM THE DONGLE (see page 7):
http://www.volkswagen-accessories.c...19-a-ba-programmierdongle-soundsystem--d-.pdf
___________________________
Step-by-step installation instructions (using links above as needed")
• Prep yourself by watching the Part #1 & #2 installation videos above!)
• Open the Helix box and remove all the goodies.
• Install the amp in the bottom of the subwoofer using the yellow template.
• Remove the 5 rubber feet (if you want the sub to fit properly on top of your spare!)
• Open the rear hatch before pulling the negative battery terminal.
• Pull the negative battery terminal. (Put paper or cardboard on top of terminal to prevent contact.)
• Remove the trunk cover, trunk mat (if you have one) and the spare tire cover.
• Replace the small “rear wheel lock-down bolt” with the longer one you bought
• Place the Helix soundbox on top of the spare wheel (but don’t bolt it down until you’re done.)
• Remove the rear seat bottom and 8 plastic child seat covers. (Link above.)
• Drop the glove box down so it’s out of the way. The “slide” on the right side will pull down and the top part may fall away. Take a look to see how it works - it’s easy to put back together. (Link above.)
• Use the special “keys” to pull out the Infotainment unit. (Link above.)
• Carefully pry up the right hand door sills and side dash cover, assuming you have a LHD car. Tools are helpful, but not necessary. (Link above.)
• Lay the wiring loom along the sill from the Infotainment unit to the spare tire and leave a little bit of slack behind the Infotainment unit (the wiring loom is PLENTY long!)
• Route the wiring loom up from the front sill to behind the Infotainment unit. (Triple-check to make sure your wiring loom is run properly so the Infotainment unit will fit correctly when pushed back in!)
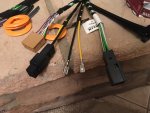
• If you’ve watched my 2 favorite installation videos (above) and have a laptop, start and stop the video as needed to assure you get the wiring connections correct. The video is perfect for wiring connections! Use your “pin removal tool” as instructed.
• When finished with the Infotainment wiring, plug the trunk end of the wiring loom into the Helix amp.
• Connect and tighten the negative terminal on your battery.
• TEST your sound system with your favorite song(s)!!
• If it sounds great (and it will), now it’s time to run your wiring loom underneath the stills. Be sure the wiring loom is run BEHIND the seat belt (towards the outside of the car,) so you will need to unplugged the wiring loom at the Helix amp, pull it up to the B pillar, then run the loom behind the seat belt (then test the seatbelt operation!) If run properly, the sill covers should pop right back into place.
• Re-plug the wiring loom into the Helix amp leaving any wiring loom slack underneath the rear seat.
• Reconnect the plastic glove box slider (on the right side) and close up the glove box.
• Replace the rear seat and 8 plastic child seat cover pieces.
• Place the Helix sub on top of the spare and use your original nut to tighten down the sub onto the spare wheel. (You ‘could’ buy a second large nut, tighten the spare with one and the sub with the other.)
• Replace the spare wheel cover and mat (if you have one.)
• Put all your tools away and double-check to make sure everything is buttoned up and put away.
• If you have purchased, rented or borrowed the Helix programming dongle, program it now. Otherwise, do it later. For programming a GTI Mk7 5-door, set dongle to #57. For other cars, Google the correct number. (Link above.)
• Drive around the block to re-set your computer and put on your favorite music to ENJOY your new sound system!