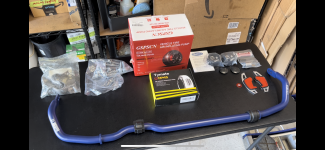
4/14-4/15: Front Sway Bar Install - Write-Up, Notes & Anecdotes
FSB Cliff's Notes: I
t effing works, and you probably need one if you like to drive fast and exploit corners.
1) Anyone telling you "a RSB is all you need, brah" has never driven a car (aggressively) with both the front & rear upgraded. Ignore them, their backwards hats, and their fruity vape juice...
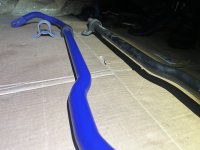
2) TireRack's special promos, sales and clearances made this mod possible. New, it's a $466 bar.
3) Comparable 28-29mm bars can be had for ~$315-350 (with bushings & hardware) from APR, ST, aFe, and many others if you search.
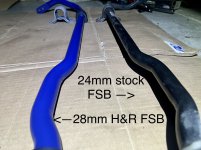
4) For me, 28mm was the minimum thickness to justify the cost and labor of this upgrade. Stock is 24mm on both the GTI & Golf R.
FSB Install - Rundown & Details
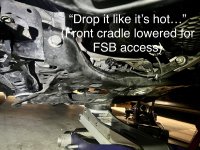
I had a very patient and loyal friend come help me with the FSB install since [initially] I did not trust myself to align the cradle solo.
Getting everything else lined up while
raising the cradle into position is the only real challenge.
Take your time, go slow. Just like you were told in that backseat on prom night.
Overall the install was extremely smooth for a VW suspension deal.
Aligning the cradle ...was actually painless and event-free. Steps outlined below:
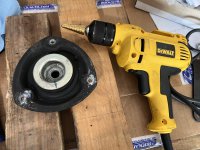
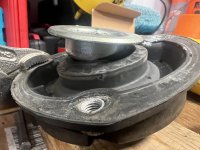
1) Using your floor jack, carefully raise the subframe into position, being mindful of the wires and FSB, and especially the left front C/V axle. The left front cradle mount can damage it if you aren't careful.
This is where having a helper is most beneficial: it's a second set of eyes to spot you when something like this getting raised and lowered.
2) Use a flashlight to look directly up into the holes and see where the bolt hole is relative to the subframe material. Shift or rotate the cradle as needed.
3) Install all 4 new bolts by hand, and leave them 2-3 turns loose at the top. This will hold the cradle supported and you can slide it in any direction you need to align it.
4) Hand-tighten (with an 18mm deep socket and 1/2" drive ratchet) the 4 main cradle bolts one at a time.
5) Go back through and check your work, using the witness market from all the dirt and grime that accumulated around where the subframe was previously.
6) Perform final torque after verifying everything else is routed correctly and properly secured in the subframe
Done.
PDF INSTRUCTIONS: We used the instructions supplied by the 034 Motorsports PDF. It was like following a recipe to make a nice dinner.
I highly recommend it here: https://www.034motorsport.com/docs/...t-sway-bar-install-guide-diy-034-402-1009.pdf
Using that PDF will make this job far less scary to anyone nervous about dropping the cradle and doing the swaybar.
But
DO reference the OE torque specs with all installs, don't just trust the aftermarket articles.
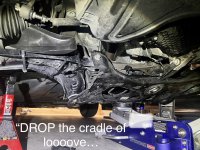
034’s method is pretty trick because it allows you to keep the lower control arms connected to the sub frame:
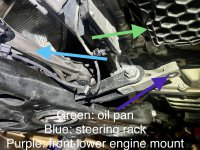
-The subframe drops down about 12 - 14 inches in the rear, 6-10" in the front, and hangs supported by the struts.
-It does not weigh much, and the steering rack is allowed to simply hover.
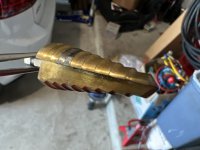
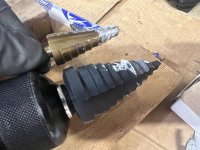
-The old FSB is removed from the rear location of the subframe. New is installed the same way
Steering Rack - I used & recommend a large, rubber bungee to support the weight of the steering rack, to avoid unwanted stress on the steering shaft.
The bungee is probably 18” long, available in a bulk pack of 6-12 @ your local China Freight. It went under the heaviest part of the rack (like a hammock), and the hooks attached to a small metal bracket on the back of the engine. This method worked out perfectly, and allowed us more room for activities.
 Anyway, the outcome of this install is 110% worth the time and effort
Previous Chassis Setup:
Anyway, the outcome of this install is 110% worth the time and effort
Previous Chassis Setup:
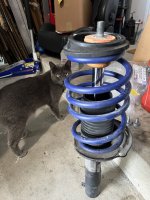
-Whiteline front LCAs w/poly bushings
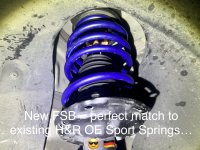
-H&R OE Sport Springs
-Stock dampers ( I know, shut it)
-ARP 25.4mm RSB
-Moog HD end links all around.
-18x8.5 lightweight wheels, 245/40 Michelin PS4S rubber
Only 2 suspension changes:
-EuroSport camber mounts; H&R 28mm FSB
FSB Recap
Each and every suspension, wheel & tire upgrade has made a palpable improvement to the car’s stability and handling dynamics.
Like many have reported from the RSB modification, the car felt way better with addition of the rear bar, but it was
still lacking body control in fast sweepers at high speeds, or even just in low-speed corners.
The weakness could be felt when turning a hard right 90* at an intersection, or going quickly across it in left-handed turns.
The front end did not feel properly supported.
Coilovers with firmer spring rates would resolve this with immediacy, but they're likely beyond my means this year.
FSB Post-Repair Test Drive
I cannot say enough good things about how balanced the car feels now:
-There is no lateral pitch and roll like there was before with the stock FSB.
-This is the first time I don’t have to be nervous or afraid when setting the car up into corners.
Yes, the camber mounts probably help.
But the biggest improvement I’m referring to is the
newfound body control from the FSB, during steering inputs and load changes that would normally roll the front end around.
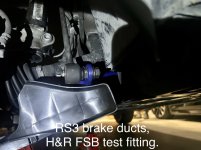
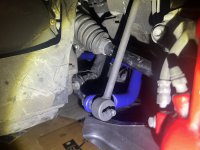
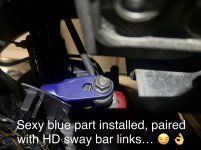
The included photos aren’t spectacular, but they still show you what was involved.
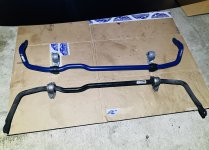
And the new bar, with its purple/indigo powder coat that matches my H&R springs, makes me feel all warm and fuzzy…like your second stiff drink at a party.

 I highly endorse this upgrade if you’re sticking with standard/drop springs and some type of strut upgrade, but are not moving to coilovers.
The coilover crowd
I highly endorse this upgrade if you’re sticking with standard/drop springs and some type of strut upgrade, but are not moving to coilovers.
The coilover crowd enjoys stiffer springs and dampers that typically do a far better job controlling body roll (when properly calibrated) than stock style springs/struts.
For those folks, I would typically advise to do the FSB
last, and only if they are still unhappy with the front end control.
Hit the like button if this post or thread helps you on your mod journey, and your fundamentals on chassis tuning.


See you in the twisties! 🏎