GOLFMK8
GOLFMK7
GOLFMK6
GOLFMKV

Sub-to-Dub's 2017 GTI Sport

Sub-to-Dub

Drag Racing Champion
Location
Arlington, VA USA
Car(s)
'17 GTI Sport 6MT
October 2022

Project:
coolant adapter replacement
Product: EMD billet coolant adapter (plus hose and clamps)
Install time: 30 minutes
Difficulty: 2/5
Parts used: EMD adapter, OEM hose (06K121051M), OEM clamps (N90686701 x2), and about a coolant reservoirs worth of pre-mixed G13 coolant.
Tools needed: a T27 driver of some sort, pliers (I used some angled needle nose pliers), a light, and a pick to help remove the old hose (and to remove any plastic that gets left in the head).


This wasn't on my radar until I saw a post about another user having this break, leaking coolant, and leaving them stranded. Mine showed no signs of leaking but for a few bucks and a couple of minutes under the hood, this seems like a no-brainer. I chose to also replace the rubber hose and clamps for good measure.

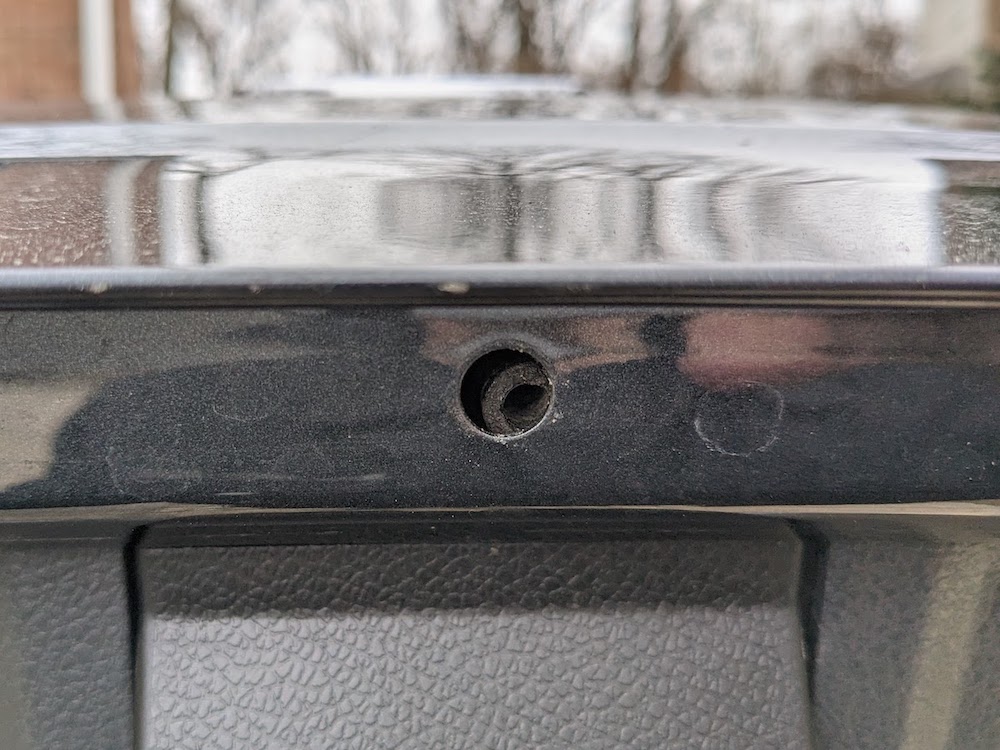
The area where the coolant adapter sits is tucked towards the back of the engine and is kind of a pain to access. Good lighting and the right tools make this much more manageable.
I also had some grease and gunk down near the adapter so I tried to clean that off before proceeding to reduce the chance of any crud getting into the cooling system.


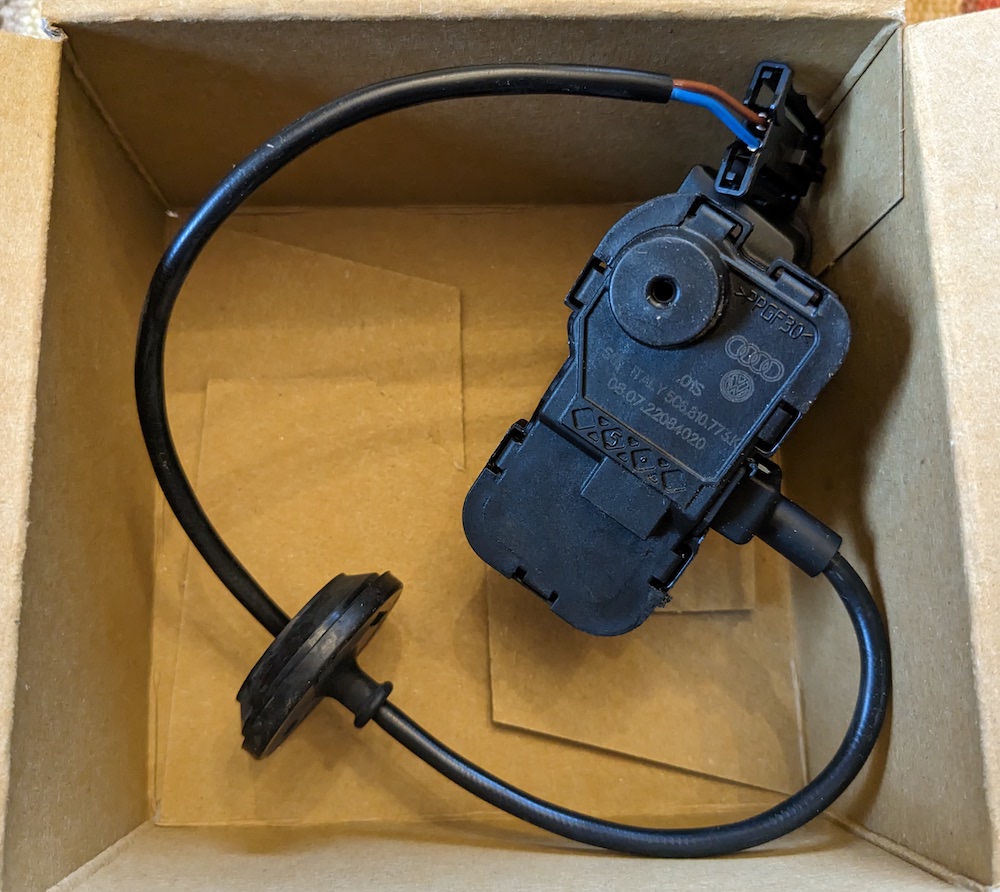
Here's the EMD part. It's nicely machined and includes an OEM washer. Seems a lot more solid than the OEM plastic part and will no doubt last longer.


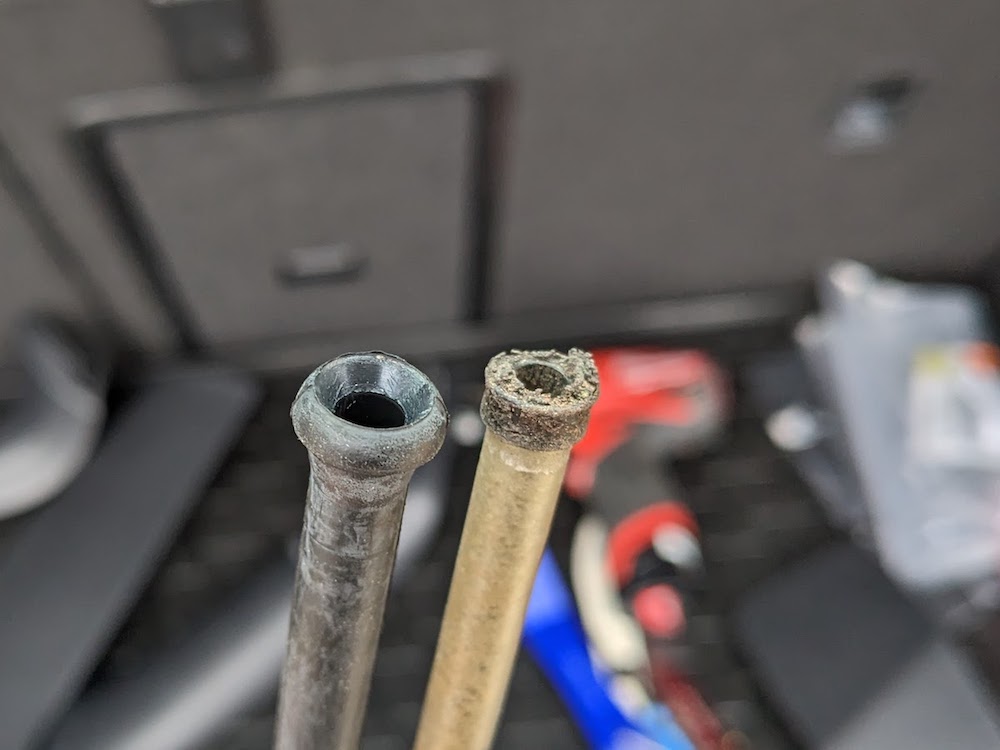
I had the new adapter, hose, and clamps all set up before removing the old part and figured I could pull the old adapter out and drop the new one in before I lost too much coolant. That would have worked except the old adapter broke and left a ring of black plastic down in the head. I had to use a pick to get it out. Not a huge deal but I ended up losing more coolant than expected. It might be a good idea to have a wide drain pan under the car to catch what spills.

I elected to move the top clamp down, slide the hose off the top metal line, unscrew the adapter, carefully pull the screw out, and pull the adapter out with the rubber hose attached. As mentioned, I had to fish out the broken plastic piece but then was able to slide the new metal adapter w/ hose attached back in.

My car only has 40k miles on it and the plastic broke as I was removing the old adapter.


Installation was easy since I had the new hose and clamps already attached. It took a push or two with a screwdriver to seat the adapter down in the hole and the screw snugged everything up.


Afterward, I topped off the system with some of the pre-mixed Peak violet coolant and let the car warm up to check for leaks. So far so good and I'm glad to have replaced a vulnerable plastic part with a metal one.
 
Last edited:

Sub-to-Dub

Drag Racing Champion
Location
Arlington, VA USA
Car(s)
'17 GTI Sport 6MT
October 2022

Product:
Cobb ABS heat shield
Install time: 5 minutes
Difficulty: 1/5
Tools needed: 13mm socket, ratchet


You'd be forgiven for questioning the usefulness of this mod but there's an appeal in replacing a plastic part with a metal one and possibly reducing some heat on an expensive part of the car.

Installation took all of five minutes and was straightforward. The only challenging part is getting a ratchet down to that lower bolt so it helps to have one with a short or flexible handle.

The OEM plastic/resin shield pulled out with a strong tug. Next, it was a matter of removing two bolts and unscrewing a thin metal bracket holding on some O2 wiring. The COBB part bolts back up using the OEM bolts (and some supplied nuts for the O2 bracket mounting spot). Some other folks have applied that gold reflective tape to cut temps even more.

Who knows if this will be useful but maybe it keeps the ABS module happy? It does look snazzy.


Last edited:

19birel

Autocross Champion
Location
Pittsburgh
Car(s)
MK7.5 - MK4 - B8.5
I just noticed the placement of that ABS module the other and thought it to be a little suspect haha. For $50 it certainly doesn't hurt to add that for the possibility of extending the abs modules life-span, I'll probably grab one of those shields at some point too
 

Sub-to-Dub

Drag Racing Champion
Location
Arlington, VA USA
Car(s)
'17 GTI Sport 6MT
Fuel door actuator replacement

Product(s): OEM fuel door actuator (PN: 5C6810773K)
Time to complete: 30 minutes
Cost (w/o shipping): $42
Difficulty: 1/5
Tools used: T20 Torx, T25 Torx, trim removal tool


The last few times I've pulled into the gas station the fuel door has refused to open. After the first incident, some quick research indicated that a plastic piece on the fuel door can interfere with the area near the actuator and cause it to stick. That seemed like an easy place to start so I filed down the area in question and added a little silicone grease for good measure.

All seemed well but the issue came back a few weeks later. I couldn't identify a pattern with rain, temperature, etc. but at $40 I just decided to replace the actuator to rule that out.


The "K suffix replaces the "H" part that came from the factory.


Installation wasn't too bad but removing and reinstalling interior trim is always a pain. I removed the lower trim at the bottom, center of the hatch opening as well as the plastic panel on the passenger side. You could probably get away with just pulling off that side trim (just remember there's a Torx bolt hiding in the luggage cover mount). This way game me plenty of access though.

The fuel door assembly is super easy to remove with one Torx screw. From there it's just a matter of unplugging the actuator in the car, pushing out the rubber grommet, and removing the unit from the outside.

I didn't get any pics of the process but I found this thread and this site helpful. There are also some videos on YouTube that show parts of the process.

During the project, I noticed the drain tube that exits at the center of the hatch had come detached (there's a black grommet that keeps the tube in place). A good thing to go check since it can cause an interior leak if detached. I guess that's next weekend's project!


------------------------------------------------------

Edit: I was curious about how the actuator works so I took the old one apart. Water had clearly gotten in at some point (possibly from the occasional wash/detail?) and there was some corrosion on the motor housing and on the two pins on the harness. Not sure if that was causing the intermittent opening issue but I sure feel better having the new one installed.


Last edited:

Sub-to-Dub

Drag Racing Champion
Location
Arlington, VA USA
Car(s)
'17 GTI Sport 6MT
Hatch drain tube replacement

Product(s):
OEM drain hose (PN: 510827861A)
Time to complete: 15 minutes
Cost (w/o shipping): $13
Difficulty: 1/5
Tools used: T20 Torx bit + driver


I noticed recently that the drain tube for the hatch latch/camera had come dislodged from the bottom of the hatch. There is a rubber grommet on the end of the tube that keeps the tube in place which had deteriorated letting the tube flop around. Fortunately, in my case, it was still kind of aligned with the hole and I wasn't having any issues with water. Regardless, it was in need of replacement.


The tube is an updated part number and seems to be pretty generic since it's longer and needs to be trimmed to fit. The old part is clear tubing with a rubber grommet attached and the new part seems to be all the same material


The actual time to install the tube was about 15 seconds, the rest of the time was spent removing and reinstalling the trim. I thought I could get away with just taking off the trim covering the drain but access was too tight.

I started by removing the 4 T20 screws from the base of the hatch trim (2 are under the flap/door thing). Next, I removed the trim at the top middle of the hatch, followed by the two side pieces, then the bottom piece exposing the drain tube. If you have a window tint be careful not to scratch the film when removing the bottom trim piece since it's wider than the opening and needs a little work to remove. I found a section of this ECS video helpful. Here's the order:


The old drain tube needed a twist with some needle nose pliers to break it free from the hatch latch/camera module then I could twist it off. Use the old tube to measure and trim the new part (be sure to account for the missing grommet - I gave myself an extra 1/4 inch or so). Feed the tube in from the bottom of the hatch and attach it to the drain.


You'll have to reinstall the trim in reverse order - lower hatch first, side panels, then the top trim piece. Give the panels a good whack to make sure they're clipped in.

Overall, very a straightforward replacement but hopefully this part will last longer than the original.

 
Last edited:

Sub-to-Dub

Drag Racing Champion
Location
Arlington, VA USA
Car(s)
'17 GTI Sport 6MT
Can you share a zoomed-out shot of where that drain is located? I don't recall seeing anything like that on my car. But I sure hear water sloshing in my hatch after a wash. My drain may be dislodged or clogged. :(

@StealthGTI it's on the bottom of the hatch door in the center by the latch. At first glance, it looks like the two rubber plugs on the left and right sides.


swcrow

Autocross Champion
Location
Virginia
Car(s)
7.5 GTI
Hatch drain tube replacement

Product(s):
OEM drain hose (PN: 510827861A)
Time to complete: 15 minutes
Cost (w/o shipping): $13
Difficulty: 1/5
Tools used: T20 Torx bit + driver


I noticed recently that the drain tube for the hatch latch/camera had come dislodged from the bottom of the hatch. There is a rubber grommet on the end of the tube that keeps the tube in place which had deteriorated letting the tube flop around. Fortunately, in my case, it was still kind of aligned with the hole and I wasn't having any issues with water. Regardless, it was in need of replacement and


The tube is an updated part number and seems to be pretty generic since it's longer and needs to be trimmed to fit. The old part is clear tubing with a rubber grommet attached and the new part seems to be all the same material


The actual time to install the tube was about 15 seconds, the rest of the time was spent removing and reinstalling the trim. I thought I could get away with just taking off the trim covering the drain but access was too tight.

I started by removing the 4 T20 screws from the base of the hatch trim (2 are under the flap/door thing). Next, I removed the trim at the top middle of the hatch, followed by the two side pieces, then the bottom piece exposing the drain tube. If you have a window tint be careful not to scratch the film when removing the bottom trim piece since it's wider than the opening and needs a little work to remove. I found a section of this ECS video helpful.

The old drain tube needed a twist with some needle nose pliers to break it free from the hatch latch/camera module then I could twist it off. Use the old tube to measure and trim the new part (be sure to account for the missing grommet - I gave myself an extra 1/4 inch or so). Feed the tube in from the bottom of the hatch and attach it to the drain.


You'll have to reinstall the trim in reverse order - lower hatch first, side panels, then the top trim piece. Give the panels a good whack to make sure they're clipped in.

Overall, very a straightforward replacement but hopefully this part will last longer than the original.


so ironically, I just took a look at mine when coming into work today....lo and behold, mine is off center like your first pic....guess I'll need to pick up the tube you mention. Did you trim to match size of old tube after you took the old tube off, or trim once one side was installed?
 

daujin_mk7

Go Kart Champion
Location
PA
Car(s)
2016 GTI DSG
so ironically, I just took a look at mine when coming into work today....lo and behold, mine is off center like your first pic....guess I'll need to pick up the tube you mention. Did you trim to match size of old tube after you took the old tube off, or trim once one side was installed?
When I had to do mine, I trimmed to match size of old tube.
 

Sub-to-Dub

Drag Racing Champion
Location
Arlington, VA USA
Car(s)
'17 GTI Sport 6MT
Things are pretty slow on the car front but I spent a few hours this weekend “modding” a cheapo HF service cart.

I don’t have a garage and my tools and cleaning supplies are about 250ft across the yard from where the GTI is parked. That inevitably means multiple trips back and forth lugging tools, jacks, fluids, etc. whenever it's car time. The cart is an easy way to haul everything in one go but the only issue is that it's not meant for the rough surfaces of the yard.

Here’s what I added to increase the capability:
  • Larger 8” pneumatic casters on a plywood base (needed a little more width given the increased height).
  • Plywood shelves for frequently used things like gloves, rags, etc.
  • Folding side tray for more surface area
  • Magnetic paper towel holder
  • Cup holder
  • On-board waste disposal system aka trash can
  • Shelf brackets and old bicycle grips to help beef up the handle (easily the worst part of this cart)
  • Foam floor pad as a liner for each shelf
  • And of course all the random car stickers I had accumulated

It's decidedly light-duty and sure ain't pretty but now glides across the yard and actually handles quite a bit of weight.

Do any driveway warriors use something similar?

 
Last edited:

Sub-to-Dub

Drag Racing Champion
Location
Arlington, VA USA
Car(s)
'17 GTI Sport 6MT
Front endlink upgrade

Product(s): MOOG greaseable front endlinks (PN: K80478), grease fitting covers
Time to complete: 30 minutes
Cost (w/o shipping): ~$45
Difficulty: 1/5


In preparation for upgrading the front sway bar, I installed a set of new front endlinks. These are beefier than the OEM ones and I like the ability to grease these. Unlike the OEM endlinks, they only need an 18mm wrench and socket to install.

Overall, the quality is good and they fit well with no clearance issues. No noticeable difference in performance but feel smoother and seem like a good foundation for the upcoming sway bar.

endlinks-1.jpg


endlinks-2.jpg


endlinks-3.jpg
 
Last edited:

Sub-to-Dub

Drag Racing Champion
Location
Arlington, VA USA
Car(s)
'17 GTI Sport 6MT
Rear control arm aero covers

Product(s): Left cover (PN: 5Q0501733), right cover (PN: 5Q0501734), OEM expanding rivets
Time to complete: 15 minutes
Cost (w/o shipping): ~$35
Difficulty: 1/5


I routinely come across this thread which has lots of great research and experimentation on retrofitting OEM underbody panels. I was intrigued about fitting the MK8 rear control arm covers on a MK7. I poked around and found the parts on clearance and decided why not!

The covers wrap over the top and kinda "snap" into place over the bolt protruding on the bottom. I chose to only use the OEM plastic rivets (vs rivets and rivnuts). There are two mounts on the top and two on the bottom. The covers feel very secure and can't really think of a way they'd ever come off (even if the clips break).

No idea if there's any reduced noise, etc. but this was a cheap and fun piece to add!

cover-1.jpg


cover-2.jpg
 
Last edited:
Top