GOLFMK8
GOLFMK7
GOLFMK6
GOLFMKV

Sub-to-Dub's 2017 GTI Sport

Sub-to-Dub

Drag Racing Champion
Location
Arlington, VA USA
Car(s)
'17 GTI Sport 6MT
Front swaybar+locking collars

Product(s): aFe 29mm front swaybar, 034 front subframe locking collar kit, ECS rear subframe locking collar kit
Time to complete: 5-6 hours
Difficulty: 3/5


I installed a front swaybar this past week and decided to also do front and rear subframe locking collar while I was going to the trouble.

The front bar and collar install wasn't technically challenging but there are lots of steps and things to keep track of. Small stuff ate up time like unclipping the oil level/VAQ wiring harness, disconnecting endlinks, and fighting the steering rack off, etc. The rear was easy since you could install the collars one bolt at a time.


Thoughts on the aFe 29mm front swaybar:
+Heavy and feels really solid
+High quality paint
+Greaseable bushings via Zerk fittings
+Well packaged and shipped quickly
+Decent printed instructions included
+Significantly cheaper than some name-brand competitors (ex. H&R)
-Mounting bolts are difficult to counter hold
-Included washers compress too easily when tightening
-Possible paint thickness issue when mounting endlinks

Installation notes:
  • The swaybar installation was ok but I ran into a few small issues. The holes for the endlink bolts were a bit too small due to the thickness of the paint so I had to bust out the rotary tool to sand some off. It's hard to say if it's aFe's fault since I was using MOOG endlinks vs OEM.
  • The bar uses Allen headed bolts that you need to counter hold while tightening and getting a socket in there was a royal PITA-wish they just used the OEM design.
  • The torque spec of 35 ft/lbs caused the washers to compress into the holes of the bracket when tightening.
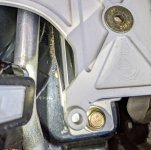
  • The mounts allow for some adjustment but still sit very close to the steering rack boots. Nothing is touching but it's tight enough I'll be checking it again in a few hundred miles.


Thoughts on the subframe locking collar kits:
+Both kits seem well made
+Zero issues with fit
+Clear instructions available online via PDF
+OEM bolts included
+Seems to reduce some noise over larger bumps
-034 kit is pricey for what it is (about $130). The ECS kit was more reasonable (about $50 on sale)

Installation notes:
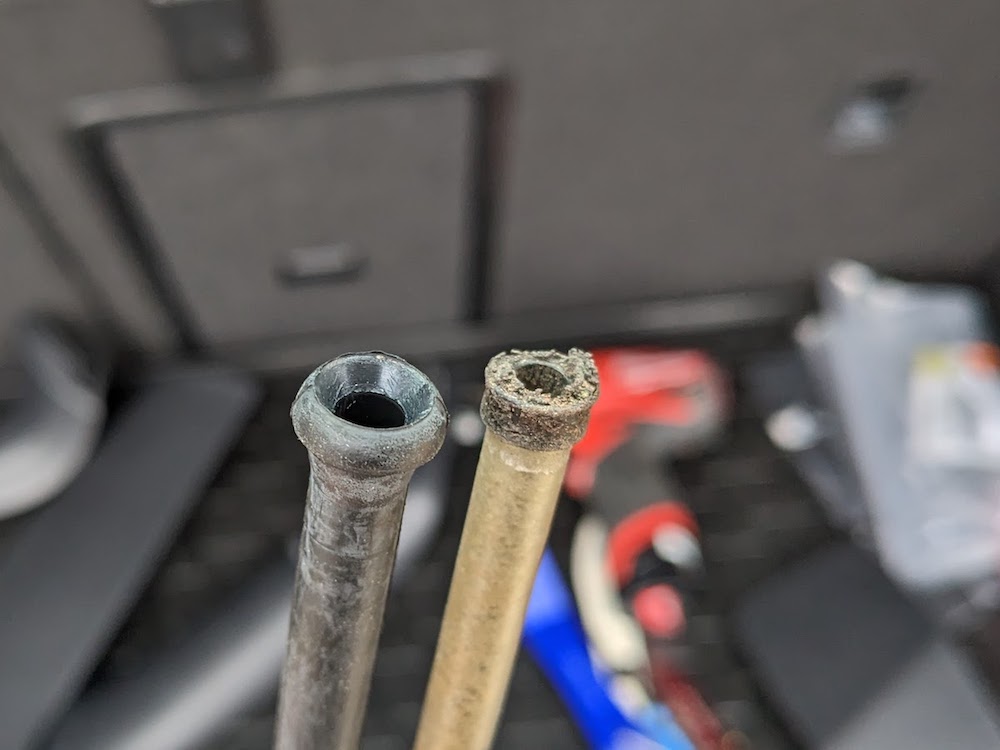
  • The rear was straightforward since you could slightly lower the subframe and install the collars one bolt at a time. The only small issue was that the instructions failed to mention some models will have an additional bolt on each side you need to remove to lower the subframe.
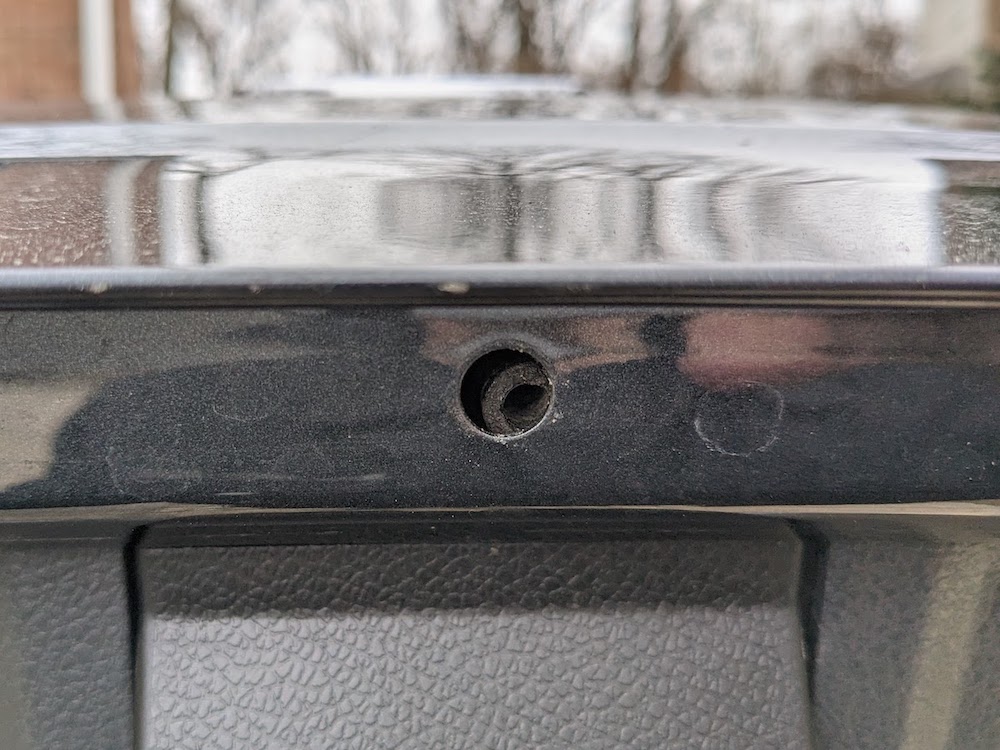
  • The front installed easily as well but it was challenging to visually verify that the upper collars were seated on the two rear bolt holes.


Overall it was a tough install for me and I'm pretty sore but ultimately everything went back together well. Most of the difficulty was due to using jack stands and having to crawl around under the car. But hey, you gotta work with what you got and I still prefer the satisfaction versus paying someone else.

The good news is that car feels great with the bar installed! There is noticeably less body roll around town (even on the softer setting) with a little increase in stiffness/bounciness in some situations. Over some larger bumps the car seems a little quieter which may be due to the collars. Only real issue is that now the seat bolsters feel inadequate...


install-1.jpg


install-2.jpg


sway-1.jpg


sway-2.jpg


sway-4.jpg


sway-3.jpg
 
Last edited:

nicholam77

Go Kart Champion
Location
Minneapolis
The rear control arm aero covers are pretty interesting. I wonder if that would help deter rust in the salt belt (like where I live :ROFLMAO: )
 

Sub-to-Dub

Drag Racing Champion
Location
Arlington, VA USA
Car(s)
'17 GTI Sport 6MT
The rear control arm aero covers are pretty interesting. I wonder if that would help deter rust in the salt belt (like where I live :ROFLMAO: )

That's certainly a possibility but I could also see these trapping moisture/salt and exacerbating the problem. I did spray a little Fluid Film down first before installing the covers although we get very little snow in my area so I'm not too concerned.
 

nicholam77

Go Kart Champion
Location
Minneapolis
That's certainly a possibility but I could also see these trapping moisture/salt and exacerbating the problem. I did spray a little Fluid Film down first before installing the covers although we get very little snow in my area so I'm not too concerned.

Yeah, I could see that happening, too. I do use Fluid Film on the suspension components, and the occasional underbody flush at the carwash when it's above 32° F (not sure if that washes the Fluid Film off or not?). Mine have faired pretty well so far. Did brakes on my wife's same model year CX-5 last month and hers were rusty. I want to keep my car long term so was just thinking maybe a plastic part might help deflect some road salt, but I have the same fear you stated.


Unrelated, but do you have a preferred method for getting the car on 4x stands? I've seen some YouTube videos (like ShopDAP's) but they all look sketchy to me.
 

Sub-to-Dub

Drag Racing Champion
Location
Arlington, VA USA
Car(s)
'17 GTI Sport 6MT
Unrelated, but do you have a preferred method for getting the car on 4x stands? I've seen some YouTube videos (like ShopDAP's) but they all look sketchy to me.

If I'm raising the car just a little to get the wheels off and I don't need to be underneath I'll jack up one side from the pinch welds just behind the door mirror, place the jack stands front and rear on the reinforced pinch weld areas, and lower the car back down. Then I repeat on the other side to match the height. I have a pad for the jack that helps reduce damage to the pinch welds as I raise the car and pads for the stands as well.

If the car needs to be higher I'll do the same thing but do it twice so it's being lifted in stages. That way the height difference side-to-side is never too great. The pic above demonstrates the limit of my jack (about 14") which I have been meaning to upgrade. If I had a garage I'd 100% be saving for a QuickJack

It's really not an ideal spot since the driveway isn't completely level but those plywood pads help to even out the ground a little. It does look a little sketchy but I always give the car a push to make sure it's stable and have never had an issue.
 

Sub-to-Dub

Drag Racing Champion
Location
Arlington, VA USA
Car(s)
'17 GTI Sport 6MT
I wanted to take a minute and post some thoughts on a new set of tires. I don't expect anyone to read this wall of text but hey, maybe somebody will find it useful 😄

During my last tire purchase I decided that since I spend 95% of my time in the GTI commuting, running errands, and driving family around that I would find tires with a greater focus on comfort. I typically shop in the performance all-season category since that has best suited my needs in the past (yes, I've heard all the arguments against this approach) so I started my search there.

While browsing Tirerack and watching a few videos I noticed they included an unknown to me brand call Vredestein in one of tests. I'd never heard of Vredestein before and some quick Googling revealed they've been around in Europe for a long time but only recently started selling tires in North America. They seemed to hold up well against the big boys (DWS06+, PSAS4, etc.) and the reviews are pretty positive.

For some insight into my frame of reference, these are the tires I've had on the GTI in the past:
  • Continental Extremecontact DWS06
  • Continental Extremecontact DWS06+
  • Michelin Pilot Sport A/S 3
  • BF Goodrich Comp-2 A/S+
Unsurprisingly, each has pros and cons but strangely the BF Goodrich have been my favorite. Very responsive, grippy, and predicable. A really fun tire but very loud and they wore down too quickly. I know the DWS06+ is an enthusiast favorite and while they had some bright spots I really didn't like the feel. Despite playing with the pressures, I found them both vague feeling and not that comfortable. The Michelin PSAS4 are another logical option but were pretty pricey and based on reviews and my experience with their predecessor would be too far in the sport direction for me. I also looked at the Bridgestone, Goodyear, and Pirelli offerings but ultimately decided to try something new and rolled the dice on the Vredestein Hypertracs. I had them installed a few months ago using the Tirerack mobile service (which is awesome BTW).

So far I have put about 1,500 miles on these and am really liking the Hypertracs. Here are some more detailed impressions:

The good:
  • Comfort - these aren't a full blown touring tire but are pretty comfortable on rough pavement. Big, sharp impacts are still rough but over broken pavement and smaller imperfections they're noticeably more comfortable. The slightly taller sidewall over stock (235/40 vs 225/40) no doubt helps as well.
  • Quiet and smooth-definitely the quietest set of tires I've had on the car to date. They're very nice on the highway and on smooth pavement. Again, this speaks to their more touring-focused nature.
  • Solid traction in the dry - aound town and on backroads these have plenty of grip. I don't drive super aggressively but keep your expectations in check and they're great.
  • Good traction in the wet - maybe slightly lower overall grip levels versus the DWS06+ but feel very predictable.
  • Minimal tramlining - these don't seem to follow imperfections in the road as much as others have.
  • Cost - these aren't a premium brand and the price reflects that. The price to performance is strong.
The meh:
  • As a direct tradeoff for the increased comport, the response is definitely lazier.
  • As a new brand (at least in the US), the warranty, support, and overall reputation is an unknown.
  • These seem to brown/discolor more quickly than other tires I've had in the past. Not a big deal as all tires do this to a degree but will certainly need a stronger tire cleaner.

Other observations:
  • These in the 235/40 size look beefier and have a squarer shoulder profile than the DWS06+ in the same size. Not a reason to choose one tire over another but it does look nicer to my eye.
  • Balanced perfectly first time (had some issues with the Continentals in the past) but these are super smooth at highway speeds using very few weights.
  • MPG seem to be up slightly from the BFGs but nothing conclusive yet. Not really surprising given the tread patterns of each.
  • I can't comment on snow/ice performance but my expectations are that they'll be fine (and nothing more) for the rare snow events we get in the DC area.
  • Using a tire pressure conversion calculator (for the slightly larger size) I started at the recommended 34 psi and bumped that up to 35 psi which works well.

Overall, I'm very satisfied with these. They have the more comfort focused nature I was looking for while still being grippy in the dry and wet. They are a more appropriate choice for how I use the car but still allow me to have fun. I'd never take them on track but, of course they're not made for that. I'm about to head out on a 4,000 mile road trip which will really put these to the test!


PXL_20230602_205402137.jpg


PXL_20230607_153756079.jpg


PXL_20230607_153806154.jpg


PXL_20230607_210629514.jpg
 
Last edited:

Sub-to-Dub

Drag Racing Champion
Location
Arlington, VA USA
Car(s)
'17 GTI Sport 6MT
Installed some fresh HID bulbs yesterday. The OE bulbs where still working fine but I was tempted to try a supposedly brighter bulb and snagged a set of Osram Night Breakers on sale. I still need to adjust the headlight levels since I never did that after lowering the car.

From start to finish the install took about an hour and a half. The actual install wasn't too bad but I struggled with getting the headlights aligned evenly between the fenders, grill, and hood. In retrospect I wish I had taking photos of the various bolt alignments to make reassembly easier.

I can't say if the new bulbs are meaningfully brighter but I will report back when I've done some nighttime driving.

Who misses the days when installing a new headlight bulb took less than a minute?!


A few Torx bits and a compact ratchet were really all that was needed.
PXL_20230908_212549644.PORTRAIT.jpg


Two bolts allows you to pop the grill off and access the front most headlight bolt. Four screws allows you to pull back the fender liner and pop off a bit of the front bumper to access one side bolt. The other two are accessible from the engine bay.
PXL_20230909_123136345.jpg


Some models seem to have a black locking collar, my car had a pair of metal tabs you pull together and slide to release the bulb. The OE bults were also made by Osram. A quick search of the model number has them as the "Original" model.
PXL_20230909_124052684.jpg


The new bulbs are definitely more blue but not sure how that may change over time.
PXL_20230909_190145785.jpg


A bonus surprise was finding some foam wrapped in plastic jammed in the fender. There's one of each side with a VW part number. I assume its for noise reduction of some sort.
PXL_20230909_124914393.jpg
 

ksurl

Go Kart Champion
Location
Socal
Car(s)
18 GTI SE DSG
Hatch drain tube replacement

Product(s):
OEM drain hose (PN: 510827861A)
Time to complete: 15 minutes
Cost (w/o shipping): $13
Difficulty: 1/5
Tools used: T20 Torx bit + driver


I noticed recently that the drain tube for the hatch latch/camera had come dislodged from the bottom of the hatch. There is a rubber grommet on the end of the tube that keeps the tube in place which had deteriorated letting the tube flop around. Fortunately, in my case, it was still kind of aligned with the hole and I wasn't having any issues with water. Regardless, it was in need of replacement.


The tube is an updated part number and seems to be pretty generic since it's longer and needs to be trimmed to fit. The old part is clear tubing with a rubber grommet attached and the new part seems to be all the same material


The actual time to install the tube was about 15 seconds, the rest of the time was spent removing and reinstalling the trim. I thought I could get away with just taking off the trim covering the drain but access was too tight.

I started by removing the 4 T20 screws from the base of the hatch trim (2 are under the flap/door thing). Next, I removed the trim at the top middle of the hatch, followed by the two side pieces, then the bottom piece exposing the drain tube. If you have a window tint be careful not to scratch the film when removing the bottom trim piece since it's wider than the opening and needs a little work to remove. I found a section of this ECS video helpful. Here's the order:


The old drain tube needed a twist with some needle nose pliers to break it free from the hatch latch/camera module then I could twist it off. Use the old tube to measure and trim the new part (be sure to account for the missing grommet - I gave myself an extra 1/4 inch or so). Feed the tube in from the bottom of the hatch and attach it to the drain.


You'll have to reinstall the trim in reverse order - lower hatch first, side panels, then the top trim piece. Give the panels a good whack to make sure they're clipped in.

Overall, very a straightforward replacement but hopefully this part will last longer than the original.

I had the rubber end come off on mine as well a while ago and didn't know this was actually a drain tube (thought it was just a rubber stop to make the hatch snug up when it's closed). Don't get nearly that much rain here but better safe than sorry (soggy hatch). Ordered mine from the local dealer for $10.
 

Sub-to-Dub

Drag Racing Champion
Location
Arlington, VA USA
Car(s)
'17 GTI Sport 6MT
Inner Axle Boot Replacement

Product(s): boot kit and replacement hardware kit
Special tools: brass punch, 24mm 12-point socket, ear-clamp pliers,
Time to complete: 3 hours
Difficulty: 2/5


During a recent oil change I noticed a ton of grease on the underside passenger area near the engine. Turns out the inner CV boot was the culprit. There were no noises or other issues but given the cost of new CV joint and axle I didn't want to wait on this one.

It's not a complicated job but did take longer than expected. No tutorials or guides to offer but I'll add a few notes from the job:
  • If this is the passenger side, have a few different extensions handy. I had to find the right combo to have room to work
  • You can remove the heat shield to get a little more room but I didn't feel the need.
  • A screwdriver in the brake rotor keeps the axle from spinning when you're removing/installing the inner bolts.
  • I needed to force the axle spindle out of the hub. A brass punch helps prevent damage,
  • You'll need special pliers to crimp the clamps on the boot (I can't really see any regular set of pliers working properly but they're not too expensive).
  • Pay attention to where the clamps are crimped and make sure they fall between the bolt holes otherwise you risk it interfering with the M10 bit
  • If needed, clean the hub where the axle spindle is inserted. Mine had some crusty stuff that would have made it difficult to reinstall.
  • This isn't an job where I'd skimp on hardware, spend a few bucks and get new OEM parts.
  • I put some blue thread locker on the inner axle bolts as a precaution.
  • On stands using a torque wrench was tough so I had to use a wobble socket to get access.
  • Should you get an alignment? Probably since you will need to remove the ball joint bolts but I likely won't.
 
Last edited:

Sub-to-Dub

Drag Racing Champion
Location
Arlington, VA USA
Car(s)
'17 GTI Sport 6MT
I noticed an issue with my BFI engine mount the other day.

It looks like the lower insert is failing and starting to twist/collapse. The bolts are tight and nothing appears to have shifted. It's kinda disappointed for only having 12k miles and since it's over two years old there's no warranty. I contacted BFI to get their thoughts but I guess it's good they sell the insert separately.


mount-1.jpg


Update:
Got around to installing the replacement bushings and the car is back to feeling 100%. It looks like the old bushing started to deform and collapse. BFI speculated it may have been from an air bubble or other imperfection.

PXL_20231118_165314558.jpg
 

Attachments

  • mount-2.jpg
    mount-2.jpg
    1.2 MB · Views: 67
Last edited:

Sub-to-Dub

Drag Racing Champion
Location
Arlington, VA USA
Car(s)
'17 GTI Sport 6MT
Lower Control Arms

Product(s): Superpro allow control arms w/bushings and replacement hardware kit
Time to complete: about 2.5/ 3 hours on jack stands
Difficulty: 2/5
Cost: ~$275 (control arms: $230, hardware: $40) + alignment


I recently had an axle out to replace a split CV boot and in a classic "while-I'm-in-there" move decided to upgrade the lower control arm bushings. I was tempted by the Superpro aluminum arms but couldn't justify the price and really they're overkill for how I use the car. However, their TRC1070 model is a direct replacement for the factory GTI control arms and has the poly bushings pre-installed which seemed easier then dealing with pressing in bushings myself.

The install was straightforward with the biggest challenge being the extra 180 degrees for each of the two control arm bolts. It was basically impossible for me to do on jack stands but got most of the way there. A large pry bar and rubber mallet or dead blow hammer come in handy to coax the old arms out and the replacements in.

Some thoughts on the installation:
  • If you have a manual trans there's no need to drop the subframe or raise the engine like on DSG cars.
  • I chose to remove the fender liner for additional clearance getting the rear part of the arm out. It's just a handful of T25 screws and it's a good chance to clean out any debris that can collect back there.
  • It helped to gently nudge the subframe apart with a pry bar where the back of the arm slides in. I still ended up needing to use a rubber mallet though.
  • Be sure to grease the bushings to keep things quiet and aid installation.
  • I used a floor jack under the arm to torque all bolts under load.
  • If you're using the RS3 brake ducts they fit like that do on the factory arms which is to say close enough but not perfectly.
  • The factory rubber bushings are really soft and mine already had some cracks at 50k miles.
  • Be sure to get an alignment afterwards!

What I like:
  • The steering is more responsive. Not mind-blowing but definitely an improvement.
  • Big improvement mid corner, the car feels much more stable and requires much less input.
  • Easy install, no pressing out the old bushings and inserting replacements
  • A sub $300 price is a great alternative to $500+ alloy models (although those do offer more benefits).
  • If you've already stiffened your suspension or have engine/trans mounts you likely won't notice any increase in NVH (I didn't).
  • Overall, the car feels really confident, stable, and solid.

What's not so hot:
  • One of the ball joint boots had a small tear. To be fair, I didn't give Superpro (or ECS) a chance to make things right but it was irritating to find that. The packaging could be better.
  • I wasn't blown away by the quality but for the money the fit and finish is probably acceptable.
  • Not really a con but you'll need an alignment after installing so factor that cost in when doing this mod.

For the money I think this is a great (mild) upgrade that offers some solid improvements for the price. I think I'd wait to combine this with other suspension work or if you're already planning to get an alignment otherwise you can add ~$100 to the price.


Packaging wasn't great. The ball joints where almost pushing through the box and the plastic covers were both cracked.
PXL_20231117_173442599.jpg


Unfortunately one of the ball joint boots had a small tear so I didn't use them. I didn't give Superpro (or ECS) a chance to make it right because I didn't want to deal with shipping these back and waiting another week or two. The factory ball joints on the car were in good shape with no play or visible damage so they got reused.
PXL_20231118_020951047.jpg


The fit and finish is kinda meh. Not a big deal for $230 bucks but the arms were not as "finished" feeling as the factory parts with some very rough edges and surface rust in a few places.
PXL_20231118_021105096.jpg


Out with the old and in with the blue!
PXL_20231118_191510560.jpg


I couldn't quite get the full 180 degrees of rotation on these bolts up on jack stands so figured I'd use a paint pen to track if the bolts loosen at all.
PXL_20231118_191504974.jpg


Toe was just a little out of spec :p, I swear I could see it just looking at the wheels. Checking back on my alignment from a few years ago, the camber seemed to jump about half a degree on both sides so that's a bonus I guess.
PXL_20231120_155819930.jpg
 
Last edited:

Sub-to-Dub

Drag Racing Champion
Location
Arlington, VA USA
Car(s)
'17 GTI Sport 6MT
As much as I love the Helix sub, it did take away a big chunk of room for all the junk in my trunk.

I recently noticed that my car didn't come with the crank arm needed to operate the jack so while I was replacing that I decided to put some thought into what I carry around and how it's all organized.

I like to be prepared but have a tendency to overpack and play the "what if" game. I got rid of a bunch of stuff then played Tetris for a while to get everything to fit. The cargo floor sits completely flat and nothing seems to rattle around so mission accomplished. Here's what made the cut:
  • Tool kit (removed the VW one and made my own from some miscellaneous tools)
  • Jumper cables (a longer 20ft set)
  • 12v tire inflator
  • Hitch + roof rack tie down stuff
  • Quart of oil
  • Jump pack
  • Fire extinguisher
  • Ice scraper
  • Picnic blanket
  • Canvasback rear seat cover
  • Spare dog leash + poop bags
...and now realizing I should probably should carry some coolant around, eh?

No real point to this post but I felt a small sense of accomplishment and wanted you all to know :p


PXL_20240125_211050830.jpg
 
Last edited:

ksurl

Go Kart Champion
Location
Socal
Car(s)
18 GTI SE DSG
I fitted my helix on top of the spare with the extended bolt and hear occasional squeaks while driving. do you have any tips on identifying and insulating that noise away?
 

Sub-to-Dub

Drag Racing Champion
Location
Arlington, VA USA
Car(s)
'17 GTI Sport 6MT
I fitted my helix on top of the spare with the extended bolt and hear occasional squeaks while driving. do you have any tips on identifying and insulating that noise away?

Hmm, no tips other than the obvious but if you're sure that's the source of the squeak then I'd try the following if you haven't already:
  • Check that the sub is sitting completely flush on the spare and the two are centered.
  • Check that both plastic nuts are centered in their respective holes (there's that lip on the nut that should center it).
  • Check that the spare and sub aren't rubbing on that rear trim piece. I had to shift both forward an inch or two so they cleared.
  • Really snug up those plastic nuts - I can push and pull on the sub/spare and nothing moves.
 

ksurl

Go Kart Champion
Location
Socal
Car(s)
18 GTI SE DSG
I’ll recheck the fitting. It started after i installed it. No other changes to the car in the back (suspension, brakes etc)
 
Top