So today's big project was to install these GTI skirts!
I ordered them from ebay:
http://www.ebay.com/itm/172135084034?_trksid=p2057872.m2749.l2649&ssPageName=STRK:MEBIDX:IT
They came from californian but were made in taiwan. The quality is probably 7/10. They're nice construction and only one small tab broke while I was opening them up.
They arrived clipped together with the hardware in a separate bag. I unclicked them and did a test fit. I took some pictures of the GTI skirts to see where they landed on the car and used that as my reference.
Installation was a 4/10 in difficulty.
Because I'm fairly OCD, i wanted to get things lined up perfect. I had a roll of gaffer tape so I used that as a straight edge and also used a silver sharpie to mark where I wanted to drill the pilot holes for the screws. I also made small dots on the receiver of the skirt to show where the heads of the screws would land. If you dont do this, you'll likely end up with the skirts installed too far back or forward. I taped the receiver up on the car and dotted out where I wanted the screws to land.
The tape on the car also served to prevent tear-out when drilling the hole. There are 12 holes to drill plus one self tapping screw in the center. I didnt drill a pilot for that one.
Once I made the marks, I drilled and 1/8th in pilot hole. First one was scary! No going back! Left side took a bit longer as I did that one first. Second side took half the time. If you set up a straight edge of some kind to get yourself a guide line you'll be much better off.
Once the screws are in, you can slide the receiving side on to the heads of the screws. I tightened them down once everything was in place. Once the receivers were installed, I clicked in the skirt itself.
Fitment was 7/10. I'm happy with the look they add and for $100 I think the fitment is pretty good. A lot depends on how you mocked it up and drilled the screws. If your rockers are perfect and have no dings or bulges you'll be in good shape. Mine had a small one on the front passenger side which prevented the receiver from sitting completely flush. Only noticeable if youre on the hunt for it.
Overhall, happy with how it came out! Interested to see how they will hold up!
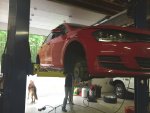
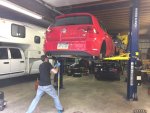
 I must say, a full shop, lift and air makes this job go much quicker.