SABO's MK7 R
Finally decided to spend some time (and go back in time) to log my trek back to VW. My life of vehicles has been '85 chevy blazer (my first love), '99 VW Jetta (first manual), '05 Nissan Murano (first solo purchase) and currently and most recently '16 Golf R 6MT (my first Turbo). So, I came back to the Vdub family after a decade with a crossover. My Murano was a great car with only major maintenance was brakes and tires. Logged 11 yrs and 100k.
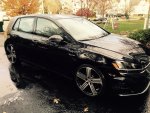
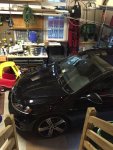
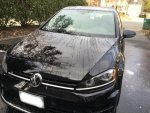
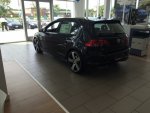
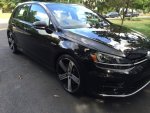
It was labor day last year when I decided to head out to window shop for a new, sportier vehicle.....and this one caught my eye. Until that moment, I was unfamiliar with the 'R' line from VW....well, that ended my search. Purchased on the spot.
The deal was fair, especially on my Murano trade for almost $7k....Came off R MSRP about $500 also with 1% financing, so all-in-all no complaints. Although the Dieselgate scandal broke mainstream a couple weeks later, so timing probably cost me at least a little (maybe?).
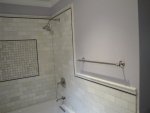
Me in a nutshell: Well I am no 'car guy' (but slowly turning), so modding wasn't on my radar, but the sales guy showed me a showroom GTI that had several APR upgrades....They are a certified APR dealer. But I really didn't have a clue or appreciation of this community and culture, but soon I'd get the bug and start a new hobby in my life. I am a handy guy, mostly house reno (pic below of a bathroom I gutted and overhauled) so it was just a matter of getting comfortable around cars....really its just about willingness to learn and taking chances.
SUMMARY OF MODS
So far I've tackled the following, listed in chronological order and the whole list is linked (just click each to navigate)
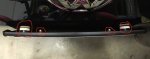
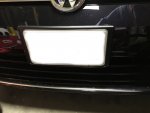
1. No-Drill Front License Plate Mount
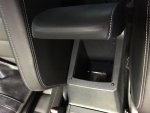
2. Center Armrest Cubby Unlock
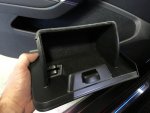
3. Driver's Storage Box Felt-Lining
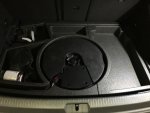
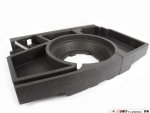
4. Trunk Organizer Foam Inserts
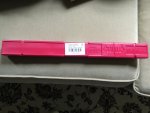
5. Warning Triangle
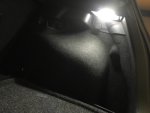
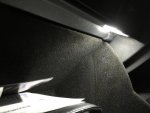
6. DeAutoKey Leds - Glovebox and Trunk
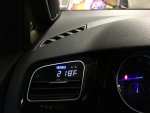
7. P3 Digital Multi-Gauge
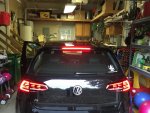
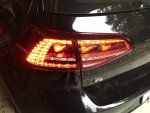
8. Dark Cherry Euro LED Tails w/ DAP Harness
9. Sunglasses Holder +1
10. VCDS Tweaks
11. DeAutoKey Reverse LEDs
12. Center Armrest Felt-Lined Organizer
13. RGM Door Sillguards
14. VW Cargo Liner
15. WeatherTech Mats
16. Front Door LED Warning Lights
17. Power Folding Mirrors
18. Front and Trunk 12V Hardwire Tap
19. Front & Rear Hardwired Dashcams
20. Accentglowled Cupholder LEDs
21. Custom Garage Opener w/ OEM Switch
22. DieselGeek Sigma 6 Short Shifter
23. DAP Shifter Bracket w/ TorqueSolution Bushings
24. BFI Black Alcantara Shift Knob
25. F1 Llumar Pinnacle 35 Tint (Professionally done)
26. LED Light Strip Under Hatch Cover
27. Llumar Air80 Windshield Tint (Professionally done)
28. Euro Switch for Rear Fog
29. DAP Euro LED Tails Dynamic Turn Signals
30. Lower Engine Cover
31. Low Profile Euro Rear Headrests
32. Front Cubby Light Up
33. USB Reroute
34. Rear Wiper Delete
35. 2nd Cabin Filter
36. Shift Knob Redo - Raceseng
37. Soundskins Sound Deadening/Noise Reduction
-More Soundskins - Doors
-More Soundskins - Rear Seat
38. Shorty's Custom OEM Short Shifter Upgrades
39. OEM Engine Skid Tray
40. OEM 8” Glass Display
MISCELLANEOUS
-DIY First Oil Change
-Personal Touches
-Washing Foamer and Stuff
Finally decided to spend some time (and go back in time) to log my trek back to VW. My life of vehicles has been '85 chevy blazer (my first love), '99 VW Jetta (first manual), '05 Nissan Murano (first solo purchase) and currently and most recently '16 Golf R 6MT (my first Turbo). So, I came back to the Vdub family after a decade with a crossover. My Murano was a great car with only major maintenance was brakes and tires. Logged 11 yrs and 100k.
It was labor day last year when I decided to head out to window shop for a new, sportier vehicle.....and this one caught my eye. Until that moment, I was unfamiliar with the 'R' line from VW....well, that ended my search. Purchased on the spot.
The deal was fair, especially on my Murano trade for almost $7k....Came off R MSRP about $500 also with 1% financing, so all-in-all no complaints. Although the Dieselgate scandal broke mainstream a couple weeks later, so timing probably cost me at least a little (maybe?).
Me in a nutshell: Well I am no 'car guy' (but slowly turning), so modding wasn't on my radar, but the sales guy showed me a showroom GTI that had several APR upgrades....They are a certified APR dealer. But I really didn't have a clue or appreciation of this community and culture, but soon I'd get the bug and start a new hobby in my life. I am a handy guy, mostly house reno (pic below of a bathroom I gutted and overhauled) so it was just a matter of getting comfortable around cars....really its just about willingness to learn and taking chances.
SUMMARY OF MODS
So far I've tackled the following, listed in chronological order and the whole list is linked (just click each to navigate)
1. No-Drill Front License Plate Mount
2. Center Armrest Cubby Unlock
3. Driver's Storage Box Felt-Lining
4. Trunk Organizer Foam Inserts
5. Warning Triangle
6. DeAutoKey Leds - Glovebox and Trunk
7. P3 Digital Multi-Gauge
8. Dark Cherry Euro LED Tails w/ DAP Harness
9. Sunglasses Holder +1
10. VCDS Tweaks
11. DeAutoKey Reverse LEDs
12. Center Armrest Felt-Lined Organizer
13. RGM Door Sillguards
14. VW Cargo Liner
15. WeatherTech Mats
16. Front Door LED Warning Lights
17. Power Folding Mirrors
18. Front and Trunk 12V Hardwire Tap
19. Front & Rear Hardwired Dashcams
20. Accentglowled Cupholder LEDs
21. Custom Garage Opener w/ OEM Switch
22. DieselGeek Sigma 6 Short Shifter
23. DAP Shifter Bracket w/ TorqueSolution Bushings
24. BFI Black Alcantara Shift Knob
25. F1 Llumar Pinnacle 35 Tint (Professionally done)
26. LED Light Strip Under Hatch Cover
27. Llumar Air80 Windshield Tint (Professionally done)
28. Euro Switch for Rear Fog
29. DAP Euro LED Tails Dynamic Turn Signals
30. Lower Engine Cover
31. Low Profile Euro Rear Headrests
32. Front Cubby Light Up
33. USB Reroute
34. Rear Wiper Delete
35. 2nd Cabin Filter
36. Shift Knob Redo - Raceseng
37. Soundskins Sound Deadening/Noise Reduction
-More Soundskins - Doors
-More Soundskins - Rear Seat
38. Shorty's Custom OEM Short Shifter Upgrades
39. OEM Engine Skid Tray
40. OEM 8” Glass Display
MISCELLANEOUS
-DIY First Oil Change
-Personal Touches
-Washing Foamer and Stuff
Attachments
-
 IMG_1106.jpg112.9 KB · Views: 8,838
 -
 IMG_1111.jpg161.9 KB · Views: 8,803
 -
 DSC00972.jpg117.4 KB · Views: 8,771
Last edited: