riceburner
Autocross Champion
- Location
- nice try PPNT
- Car(s)
- MK5 Best GTI
This will be a rather detailed post, purposed for both NOVICES and ENTHUSIASTS who want to keep their car FRESH and CLEAN. It may seem like overkill to many but most all tips in here DO help keep your car clean and SWIRL FREE. Experienced washers may find some new tricks in here to feel free to stay tuned or pass through areas you already wrote the book on!
As a detailing enthusiast I want everyone with a GTI or sportscar for that matter to represent the community well by keeping their rides not janky, but showroom fresh.
These are tips I have learned over the years from a multitude of people, and some tips I came up with myself (or haven’t heard them elsewhere yet). A few people I’d like to give credit to are Larry at Ammo NYC (who makes awesome tutorials and products) and some youtuber named Junkman2000.
Benefits of these washing techniques include:
Resale value
Protection / rust prevention
Show shine finish
Regular maintenance
I have broken this post into separate posts for those looking to see more about:
SUPPLIES - POST 1
WHEEL CLEANING / EXHAUST / FLOOR MATS - POST 1
PAINT CLEANING http://www.golfmk7.com/forums/showpost.php?p=382610&postcount=2
RINSING / DRY/QUICKWAX http://www.golfmk7.com/forums/showpost.php?p=382620&postcount=3
FINAL TOUCHUPS/MAINTENANCE http://www.golfmk7.com/forums/showpost.php?p=382627&postcount=4
The level of detail and care you put into washing your car depends on how many swirls you want in your paint.
TIP ONE: NEVER put your car through an automatic wash. TOUCHLESS ONLY. Besides that, hand wash ONLY. Unless of course, you like your car to look swirly and don’t care much for resale.
TIP TWO: For those who DO wash their car by hand, never use dish soap! Seen SO many people washing their car with dish soap. That's a big no-no, as it removes any waxes on the car! Don't use it, unless you are planning to polish and wax/seal afterwards!
General note: If this is your first time doing all this, It may seem daunting but the amount of crap you knock off of your car will be amazing. Following this and doing everything listed here regularly you will be surprised how much easier it becomes and how much less effort is needed to MAINTAIN the cleanliness rather than working backwards to remove TONS of dirt/brake dust/buildup.
So lets get to it!
Of course first things first, SUPPLIES.
This is a basic list of things you need to perform these FOUR bucket washes.
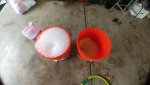
4 5-Gallon buckets, color coded!
1 bucket: For sitting on while doing the wheels/etc
1 bucket: Wheel supplies
1 Bucket: Suds bucket for paint
1 bucket: Rinsing bucket for wash mitt
Wheel tools/ supplies:
1 or two washmitts
Various brushes (different sizes for different purposes), and a ‘wheel woolie’
Wheel cleaning suds of your choice. I use chemical guys products mostly
Paint cleaning:
The two buckets, and bucket grit gaurds for both buckets
Two wash mitts
Car ‘shampoo’ (again your choice, I stick to chemical guys, and steer clear of most store bought crap)
**Car shampoo should have some form of wax/protectant in it, which most do these days
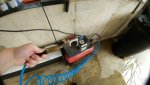
Weed killer pressure sprayer jug or ‘waterless wash kit’
Waterless wash
Microfiber towels
Another scrubbing brush, soft bristles only
Bug/tar remover

.jpg")
Paint drying:
One or two large microfiber towels, waffle weave in my case
Spray detailing/wax/sealant
Air compressor with nozzle, or leaf blower
Extra:
Toothbrushes, all purpose cleaner, more microfiber towels
WHEELS/EXHAUST/FLOOR MATS:
IMPORTANT: All wheel tools/mitts/buckets are for wheels/exhaust/floormats/engine ONLY. Once something has touched the wheels, it cannot be used on paint. To some this is obvious, to others, not so much! Your calipers and rotors create brake dust which is microscopic abrasive metal shavings. You do not want to scrape all that into your paint. Also, this is why the wheels are washed first, so that when you wash the car, just by the slight chance that your mitt comes into contact with a wheel, you aren’t then bringing all that onto the paint.
So, step one is the wheels. Set up your one bucket upside down for sitting on! Each wheel takes approximately 5 minutes to clean! Get comfy.
Rinse the wheel down with high pressure to knock off all mud that you can. Spray the inside of the wheel well also with high pressure.

Spray the wheel with your cleaner of course, inside and out, and also a few squirts over your calipers.
The order of operation and reasoning is this:
Start from top to bottom cleaning the outside of your spokes. Then move into your lug nut area and squeeze your mitt into those. Then run the edge of the mitt carefully along the entire outside of your rim. These are actually the cleanest part of your rim.

Then, run your mitt (or SECOND MITT, preferably) along the wheel barrel, it’s a two hand process: Insert the mitt into the barrel then use your other hand to push and pull it around between the brake rotor and the barrel, reaching in as much as you can. Then you may want to dunk the mitt into your wheel bucket (full of tools/water) and then do the backside of your wheel spokes and area where the wheel comes into the hub. You can also use a 'wheel woolie' (pictured)

definitely picks some stuff up..

Finally, do as much as you can to clean the pretty red calipers! This is where some various toothbrushes/ scrubbers really come into play.


Then, a few more squirts of product on your tires and wheel wells..
Scrub your tire both around the tire back and forth, and then ‘up and down’ to follow the tire ‘design’ ridges.

Take another brush or wheel woolie deal and get at your wheel well. Scrub up down in and out but avoid touching your PAINT at all costs. Do your best; these are the sorts of things that separate a clean car from a detailed car.

Look at these calipers and wheel barrels! You will NOT get this from an auto wash or even a detail shop!


Once you’ve done your wheels you can then use some product and the mitt on your exhaust tips (only when they are cold). Spray the water lightly into the pipe but be careful.


Finally, the rubber mats (if you have them) can be cleaned using a brush and also wheel soap, but rinse the matts down well before and don’t use too much product – weathertechs are actually sensitive to too much product. Rinse them off and let them air dry OUT of direct sunlight!

As a detailing enthusiast I want everyone with a GTI or sportscar for that matter to represent the community well by keeping their rides not janky, but showroom fresh.
These are tips I have learned over the years from a multitude of people, and some tips I came up with myself (or haven’t heard them elsewhere yet). A few people I’d like to give credit to are Larry at Ammo NYC (who makes awesome tutorials and products) and some youtuber named Junkman2000.
Benefits of these washing techniques include:
Resale value
Protection / rust prevention
Show shine finish
Regular maintenance
I have broken this post into separate posts for those looking to see more about:
SUPPLIES - POST 1
WHEEL CLEANING / EXHAUST / FLOOR MATS - POST 1
PAINT CLEANING http://www.golfmk7.com/forums/showpost.php?p=382610&postcount=2
RINSING / DRY/QUICKWAX http://www.golfmk7.com/forums/showpost.php?p=382620&postcount=3
FINAL TOUCHUPS/MAINTENANCE http://www.golfmk7.com/forums/showpost.php?p=382627&postcount=4
The level of detail and care you put into washing your car depends on how many swirls you want in your paint.
TIP ONE: NEVER put your car through an automatic wash. TOUCHLESS ONLY. Besides that, hand wash ONLY. Unless of course, you like your car to look swirly and don’t care much for resale.
TIP TWO: For those who DO wash their car by hand, never use dish soap! Seen SO many people washing their car with dish soap. That's a big no-no, as it removes any waxes on the car! Don't use it, unless you are planning to polish and wax/seal afterwards!
General note: If this is your first time doing all this, It may seem daunting but the amount of crap you knock off of your car will be amazing. Following this and doing everything listed here regularly you will be surprised how much easier it becomes and how much less effort is needed to MAINTAIN the cleanliness rather than working backwards to remove TONS of dirt/brake dust/buildup.
So lets get to it!
Of course first things first, SUPPLIES.
This is a basic list of things you need to perform these FOUR bucket washes.
4 5-Gallon buckets, color coded!
1 bucket: For sitting on while doing the wheels/etc
1 bucket: Wheel supplies
1 Bucket: Suds bucket for paint
1 bucket: Rinsing bucket for wash mitt
Wheel tools/ supplies:
1 or two washmitts
Various brushes (different sizes for different purposes), and a ‘wheel woolie’
Wheel cleaning suds of your choice. I use chemical guys products mostly
Paint cleaning:
The two buckets, and bucket grit gaurds for both buckets
Two wash mitts
Car ‘shampoo’ (again your choice, I stick to chemical guys, and steer clear of most store bought crap)
**Car shampoo should have some form of wax/protectant in it, which most do these days
Weed killer pressure sprayer jug or ‘waterless wash kit’
Waterless wash
Microfiber towels
Another scrubbing brush, soft bristles only
Bug/tar remover
Paint drying:
One or two large microfiber towels, waffle weave in my case
Spray detailing/wax/sealant
Air compressor with nozzle, or leaf blower
Extra:
Toothbrushes, all purpose cleaner, more microfiber towels
WHEELS/EXHAUST/FLOOR MATS:
IMPORTANT: All wheel tools/mitts/buckets are for wheels/exhaust/floormats/engine ONLY. Once something has touched the wheels, it cannot be used on paint. To some this is obvious, to others, not so much! Your calipers and rotors create brake dust which is microscopic abrasive metal shavings. You do not want to scrape all that into your paint. Also, this is why the wheels are washed first, so that when you wash the car, just by the slight chance that your mitt comes into contact with a wheel, you aren’t then bringing all that onto the paint.
So, step one is the wheels. Set up your one bucket upside down for sitting on! Each wheel takes approximately 5 minutes to clean! Get comfy.
Rinse the wheel down with high pressure to knock off all mud that you can. Spray the inside of the wheel well also with high pressure.
Spray the wheel with your cleaner of course, inside and out, and also a few squirts over your calipers.
The order of operation and reasoning is this:
Start from top to bottom cleaning the outside of your spokes. Then move into your lug nut area and squeeze your mitt into those. Then run the edge of the mitt carefully along the entire outside of your rim. These are actually the cleanest part of your rim.
Then, run your mitt (or SECOND MITT, preferably) along the wheel barrel, it’s a two hand process: Insert the mitt into the barrel then use your other hand to push and pull it around between the brake rotor and the barrel, reaching in as much as you can. Then you may want to dunk the mitt into your wheel bucket (full of tools/water) and then do the backside of your wheel spokes and area where the wheel comes into the hub. You can also use a 'wheel woolie' (pictured)
definitely picks some stuff up..
Finally, do as much as you can to clean the pretty red calipers! This is where some various toothbrushes/ scrubbers really come into play.
Then, a few more squirts of product on your tires and wheel wells..
Scrub your tire both around the tire back and forth, and then ‘up and down’ to follow the tire ‘design’ ridges.
Take another brush or wheel woolie deal and get at your wheel well. Scrub up down in and out but avoid touching your PAINT at all costs. Do your best; these are the sorts of things that separate a clean car from a detailed car.
Look at these calipers and wheel barrels! You will NOT get this from an auto wash or even a detail shop!
Once you’ve done your wheels you can then use some product and the mitt on your exhaust tips (only when they are cold). Spray the water lightly into the pipe but be careful.
Finally, the rubber mats (if you have them) can be cleaned using a brush and also wheel soap, but rinse the matts down well before and don’t use too much product – weathertechs are actually sensitive to too much product. Rinse them off and let them air dry OUT of direct sunlight!
Attachments
-
 2 DIRTY CAR.jpg365.4 KB · Views: 2,062
Last edited:

.jpg")


") ) Additionally, you need to be building up layers between all washes, and doing this every wash provides a little safety net against the elements and your next wash.
) Additionally, you need to be building up layers between all washes, and doing this every wash provides a little safety net against the elements and your next wash.