SomethingNew71
TDI Pro
- Location
- NC
- Car(s)
- 2009 JSW TDI
How to - Install a Dual Camera Dashcam
So you may have already seen my other post about installing a single front facing dash cam on my GTI. Well, I am back and I thought I would share how to install a new dash cam with both a front AND rear facing camera. This should be the same on any MK7 Golf variant but don't hold me to that!!
If you look at my other post you will also notice I reused some of the photos. No sense in repeating it if nothing really changed. Most of the new images are later in the post.
Last Post: Golf MK7 - How to install a Dash Cam
Supplies:
Step 1 - Open up your car
Use a Nylon Pry tool or something soft top pop this open.
Closed:

Open(Ignore the already installed wires I took these pictures after I was done):

Pull your Drawer out by moderately squeezing together and pulling out.

Step 2 - Wire it up:
I chose this fuse slot for the dash cam since its only on when the key is set to accessory. So this means the dash cam powers on with the car. And turns off when it turns off. I have no idea what this fuse is for. End of the day though this circuit wont cause any problems because the add-a-circuit retains an original fuse and the your dash cam will get its own specific fuse.

Connect the red line(hot) of the hard-wire kit to the red "add-a-circuit" line. Then connect your black line(ground) to a bolt wire connector and then clamp it to the silver bolt in the bottom left corner of the image below.


Take the original 10-fuse out and put it in one slot of the add-a-circuit and then add an additional 10-fuse to the second slot which is for your dash cam. You can then plug the add a fuse into the fuse slot pointed out above.


After this tidy up the wires and shove that sh** back into that opening.
Step 3: Conceal the wires
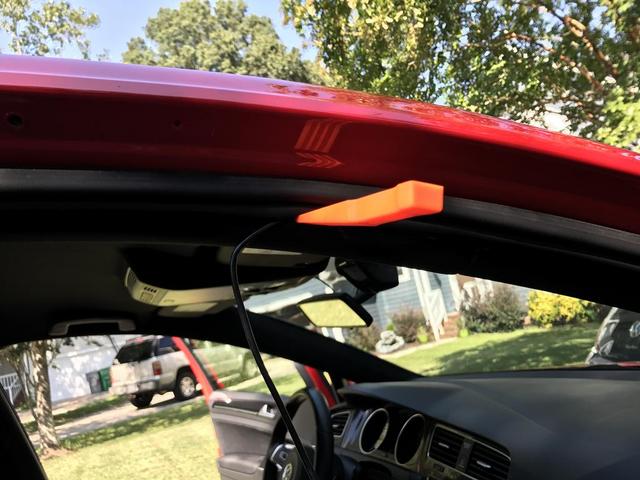
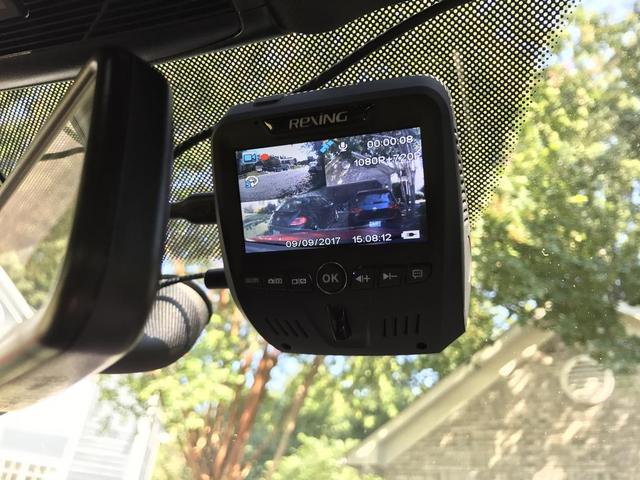
I ran my wires up the A-pillar of the car. Just carefully stuff it into the edge of the headliner using the nylon pry tools and then plug into the dash cam. I found that was the easiest way to do this but it still takes a little time. I chose to put my camera right behind my rear view mirror since that hides it really well. If you aren't looking for it you won't see it from the outside of the car.
WARNING: DO NOT COVER THE AIRBAGS.
I think its pretty unlikley a small wire would stop the airbag from deploying but its better safe than sorry.


Step 4: Start Wiring the rear camera
Now this is where it gets spicy. From here it becomes a bit more challenging but is totally doable for even the people with fainter of hearts. You effectively follow the same idea of stuffing the wire into the headliner but you run it across the passenger side, down the right(if in USA) side of the car and all the way to the back. Which will have some more detail in step 5.

Step 5: Take apart the Hatch
Once you arrive at the back of the car you will need to actually remove the paneling a bit from the rear of the car. DONT WORRY its not as bad as you think. Just take your time and slowly pry the panels off one by one. Don't force it just go slow and be careful not to break any clips.


Now remove one or both ends of the waterproof routing conduit and run your wire through this. THIS KEEPS THE CAR WATER TIGHT


Route the wire through the hole in behind door where the hatch panel came off.


Then return panels to the car, close up the water tight conduit and stick youre rear camera on the car.


Step 6: Celebrate!
And there you have it. You now have a camera on the front AND back of your car. NEAT. If you enjoyed this guide or have any questions please post them.
Also if you end up with any cool dash cam footage please share it on the thread! I love seeing crazy stuff on the road
So you may have already seen my other post about installing a single front facing dash cam on my GTI. Well, I am back and I thought I would share how to install a new dash cam with both a front AND rear facing camera. This should be the same on any MK7 Golf variant but don't hold me to that!!
If you look at my other post you will also notice I reused some of the photos. No sense in repeating it if nothing really changed. Most of the new images are later in the post.
Last Post: Golf MK7 - How to install a Dash Cam
Supplies:
- Dashcam - http://amzn.to/2wha8c0
- Wiring Kit - http://amzn.to/2l3ixzl
- SD Card(128GB) - http://amzn.to/2wh66Ai
- Pry Tools - http://amzn.to/2eWkc7n
- Add a Fuse - http://amzn.to/2sp8U0U
Step 1 - Open up your car
Use a Nylon Pry tool or something soft top pop this open.
Closed:
Open(Ignore the already installed wires I took these pictures after I was done):
Pull your Drawer out by moderately squeezing together and pulling out.
Step 2 - Wire it up:
I chose this fuse slot for the dash cam since its only on when the key is set to accessory. So this means the dash cam powers on with the car. And turns off when it turns off. I have no idea what this fuse is for. End of the day though this circuit wont cause any problems because the add-a-circuit retains an original fuse and the your dash cam will get its own specific fuse.
Connect the red line(hot) of the hard-wire kit to the red "add-a-circuit" line. Then connect your black line(ground) to a bolt wire connector and then clamp it to the silver bolt in the bottom left corner of the image below.
Take the original 10-fuse out and put it in one slot of the add-a-circuit and then add an additional 10-fuse to the second slot which is for your dash cam. You can then plug the add a fuse into the fuse slot pointed out above.
After this tidy up the wires and shove that sh** back into that opening.
Step 3: Conceal the wires
I ran my wires up the A-pillar of the car. Just carefully stuff it into the edge of the headliner using the nylon pry tools and then plug into the dash cam. I found that was the easiest way to do this but it still takes a little time. I chose to put my camera right behind my rear view mirror since that hides it really well. If you aren't looking for it you won't see it from the outside of the car.
WARNING: DO NOT COVER THE AIRBAGS.
I think its pretty unlikley a small wire would stop the airbag from deploying but its better safe than sorry.
Step 4: Start Wiring the rear camera
Now this is where it gets spicy. From here it becomes a bit more challenging but is totally doable for even the people with fainter of hearts. You effectively follow the same idea of stuffing the wire into the headliner but you run it across the passenger side, down the right(if in USA) side of the car and all the way to the back. Which will have some more detail in step 5.
Step 5: Take apart the Hatch
Once you arrive at the back of the car you will need to actually remove the paneling a bit from the rear of the car. DONT WORRY its not as bad as you think. Just take your time and slowly pry the panels off one by one. Don't force it just go slow and be careful not to break any clips.
Now remove one or both ends of the waterproof routing conduit and run your wire through this. THIS KEEPS THE CAR WATER TIGHT
Route the wire through the hole in behind door where the hatch panel came off.
Then return panels to the car, close up the water tight conduit and stick youre rear camera on the car.
Step 6: Celebrate!
And there you have it. You now have a camera on the front AND back of your car. NEAT. If you enjoyed this guide or have any questions please post them.
Also if you end up with any cool dash cam footage please share it on the thread! I love seeing crazy stuff on the road
Last edited: