Purcell
Passed Driver's Ed
- Location
- Spokane, WA
Since the installation of the deAutoLED footwells was a little tricky for me (the housing and setup might be different since I have a 2016), here's a guide of how to do it. I've included a few pictures of the highlights of the processes).
Driver's Side (First 3 pictures)
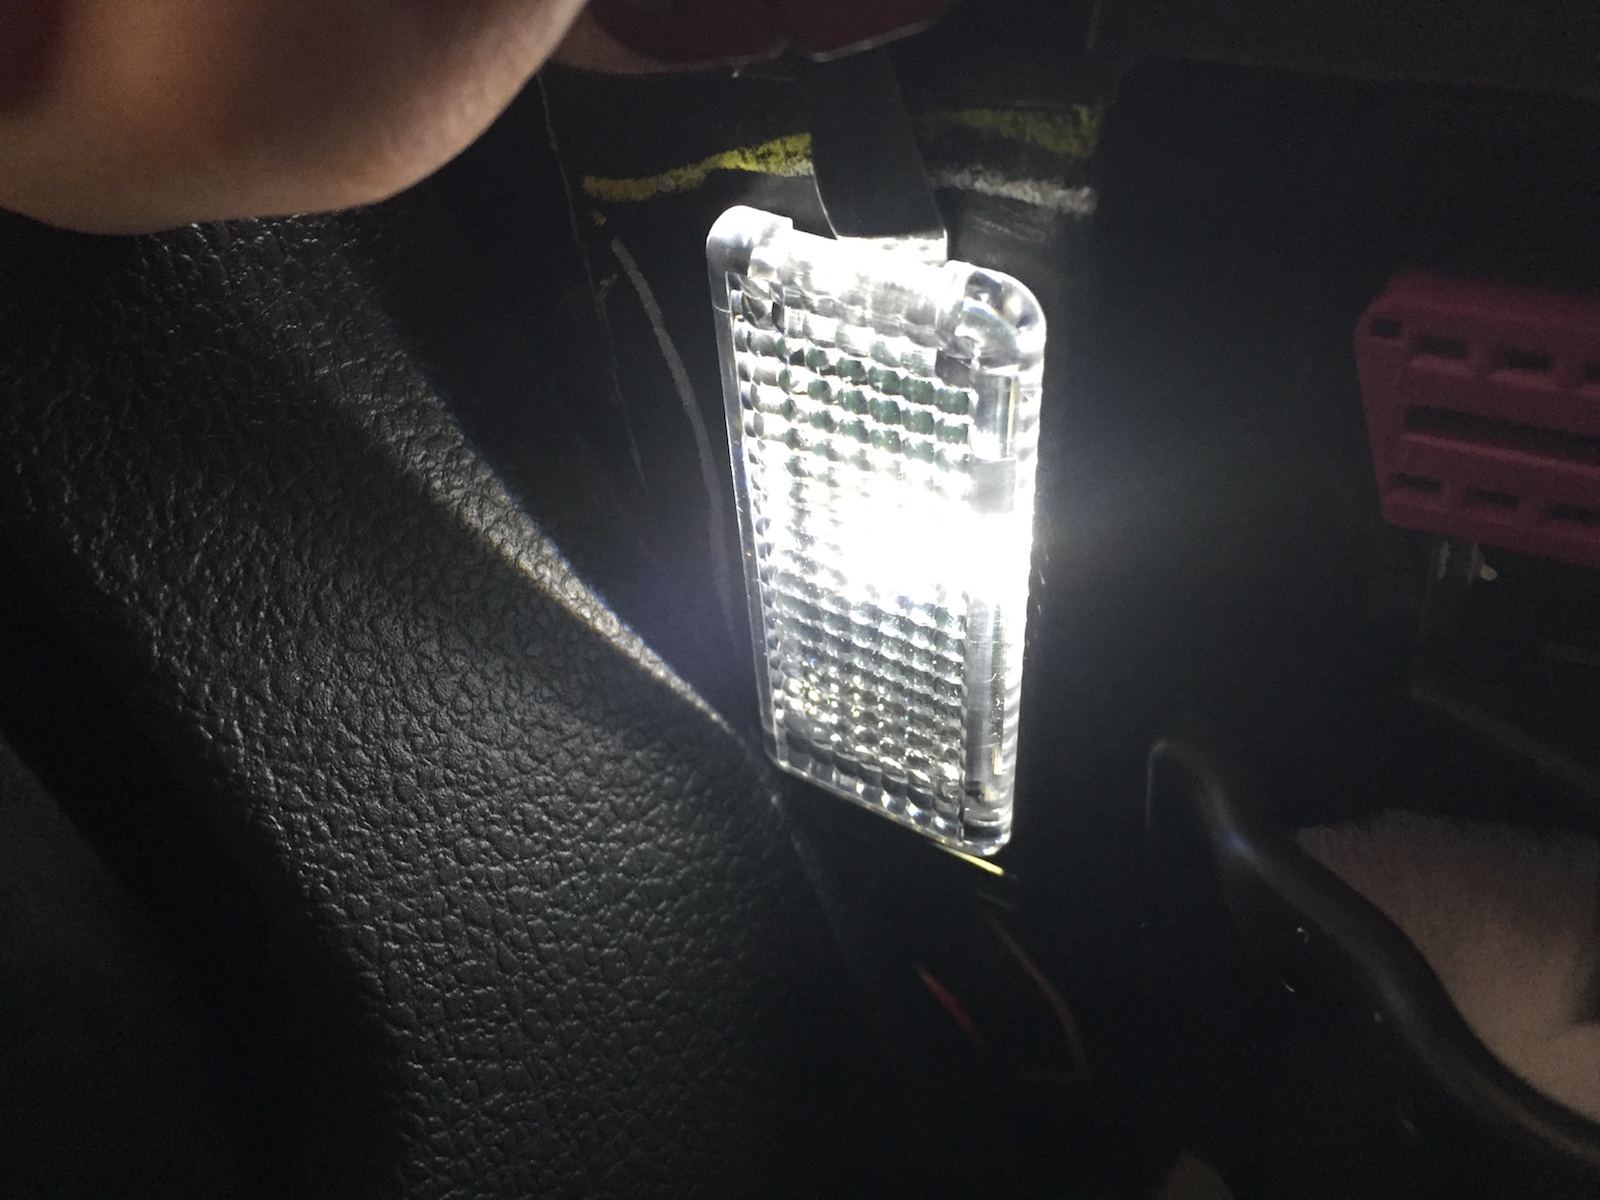
Step 1 -
Starting on the driver's side, locate the footwell LED. Using a flathead screwdriver (installation would be easier with the deAutoLED interior toolkit), stick the flathead into the small cutout and pop out the housing.
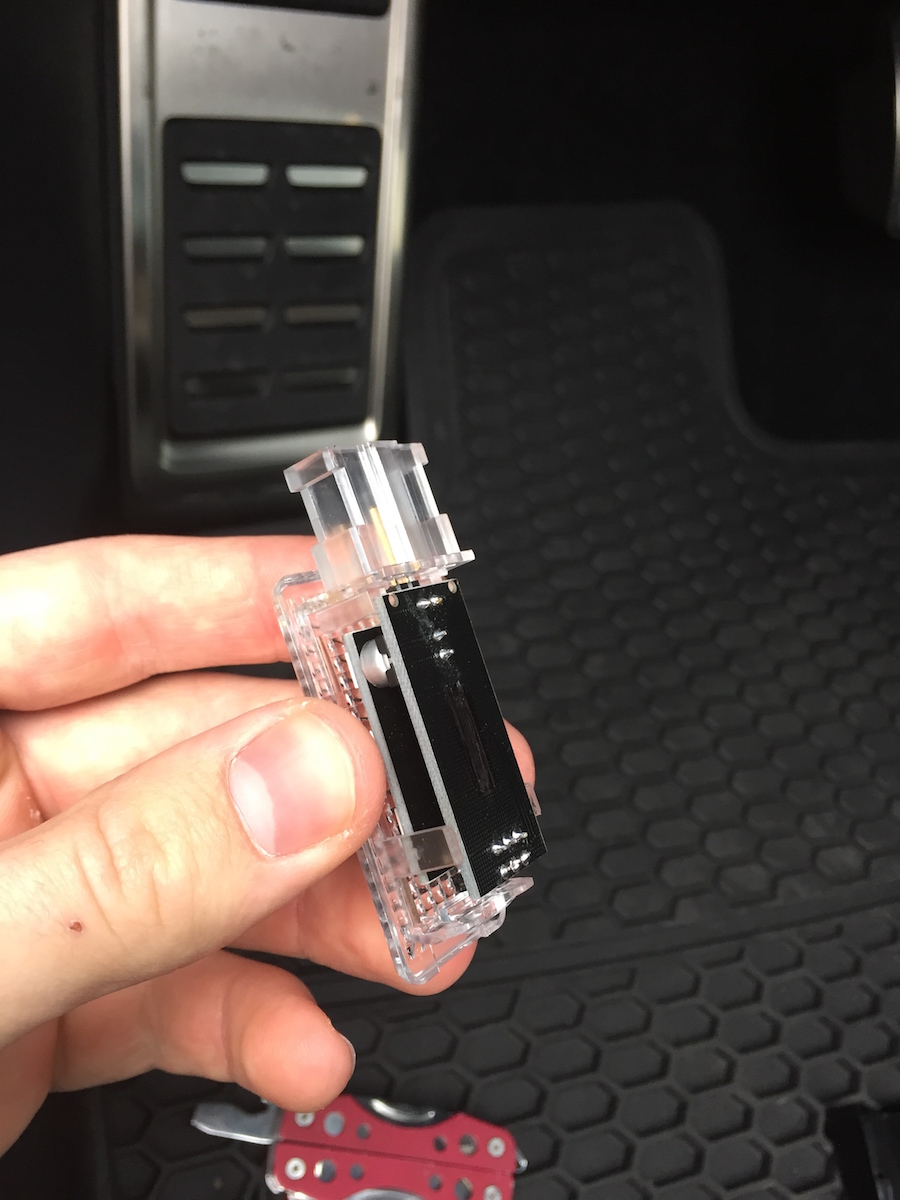
Step 2 -
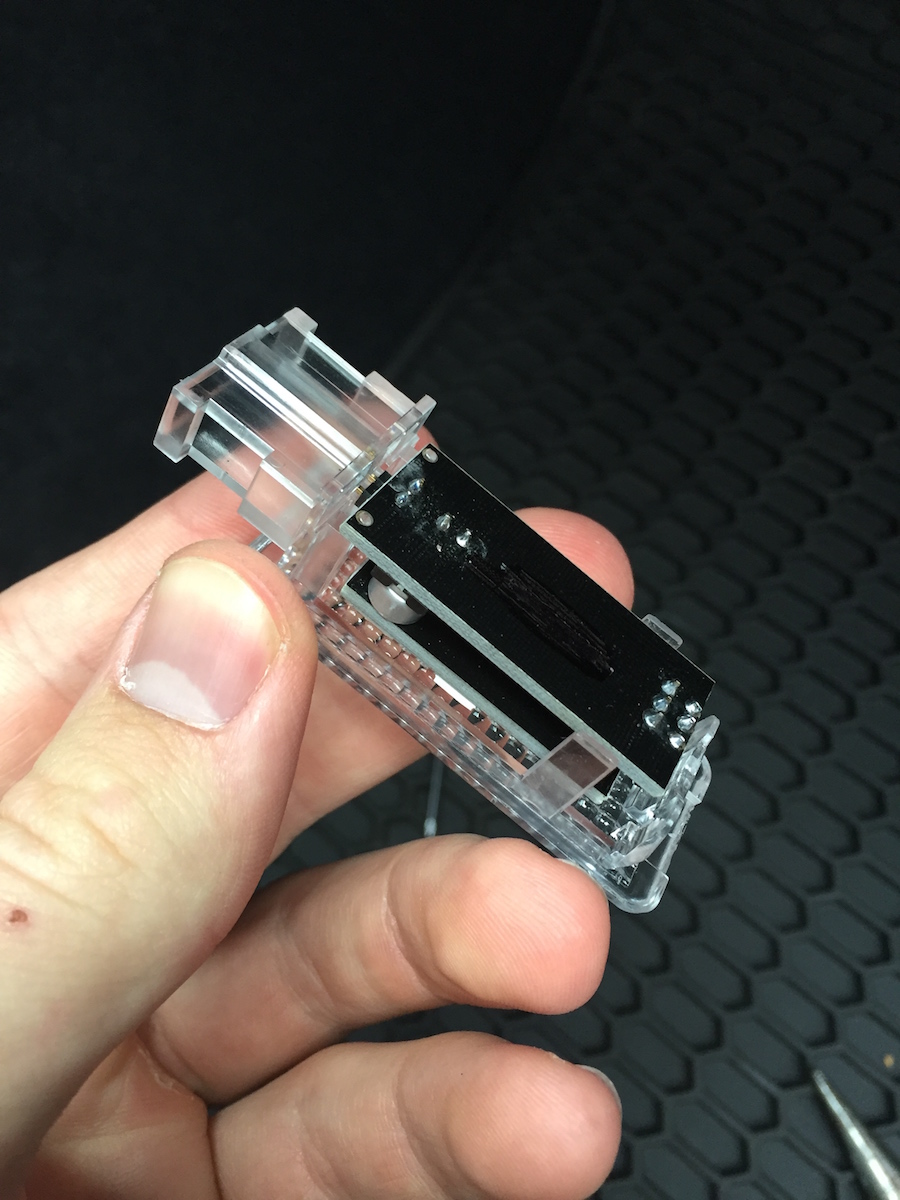
The housing will be connected to the power supply. Carefully detach the cable by pushing in on the two small tabs on the side of the cable. Then, remove the black casing. Carefully remove the OEM LED and replace it with the deAutoKey LED.
Step 3 -
Pop the black casing back on, plug back into the cable (this will likely be difficult because of the tight spacing, but won't be as difficult if you don't have large hands like I do). Once plugged back in, pop the housing back into place. The driver side is now done.

Passenger's Side (Last 4 pictures)
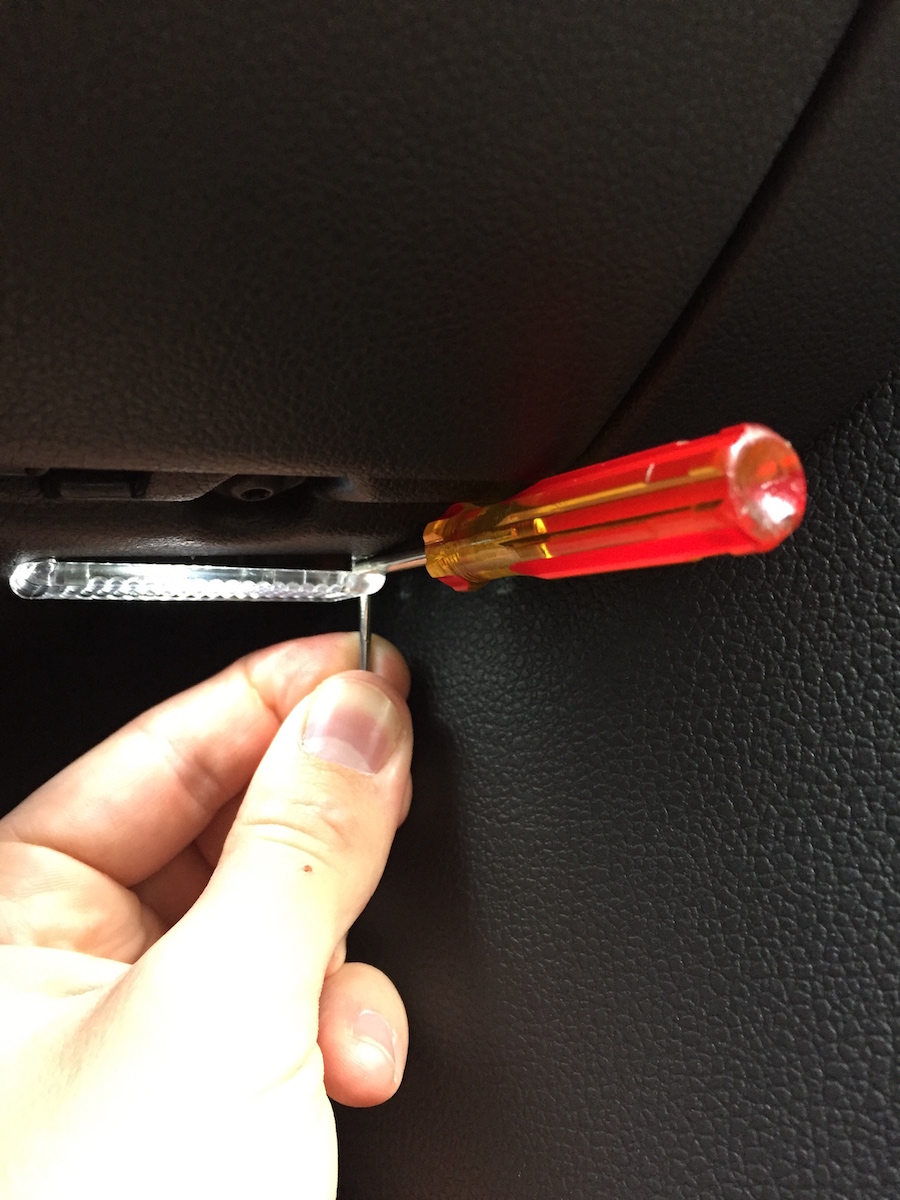
Step 1 -
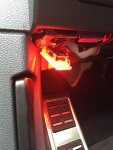
The housing on this side is somewhat difficult to remove, but be patient and you will get it. What I did to remove the housing was to use the head of a nail on the right most side of the housing (there will be a small notch, just like the driver's side housing). Once you've pulled enough, there will be a small gap where you will need to poke your flathead screwdriver into. Push down on this stubborn housing and it will come out.
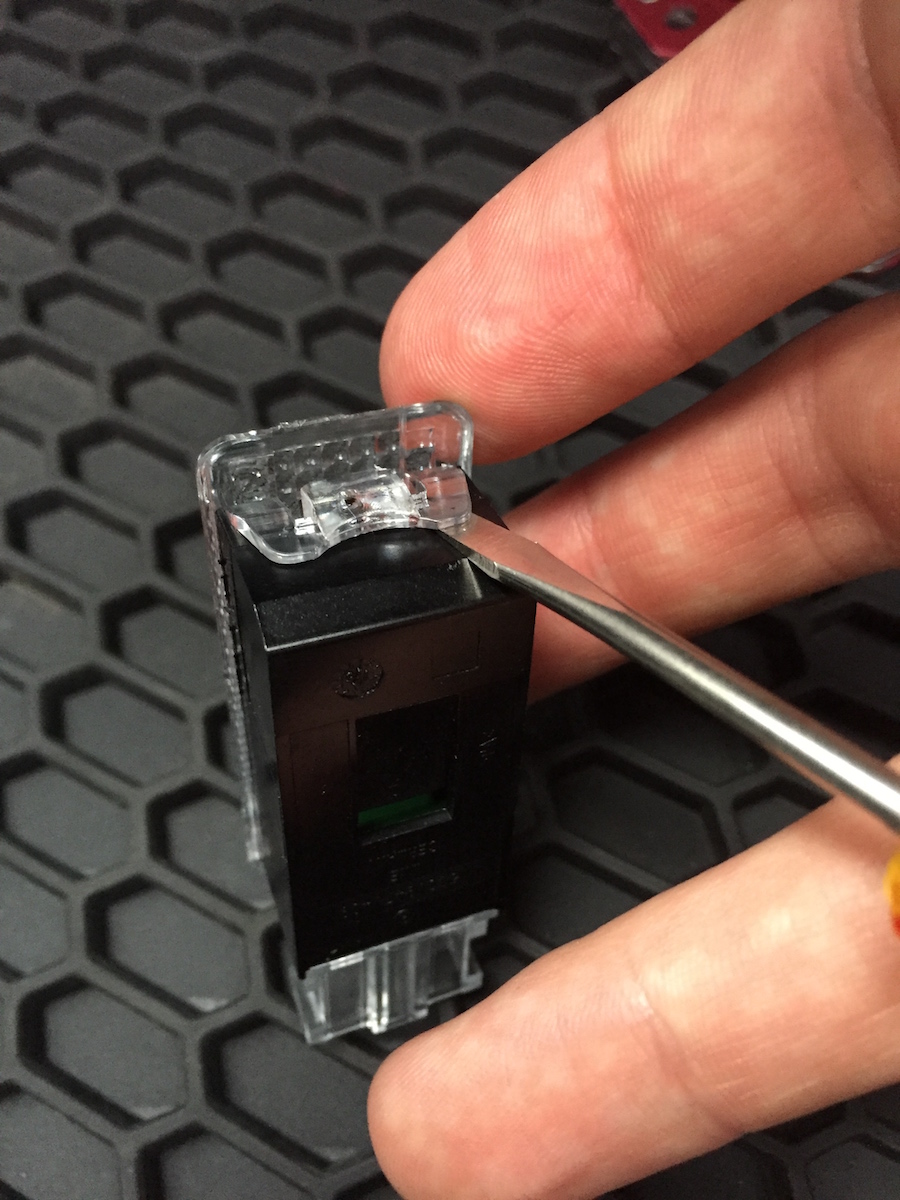
Step 2 -
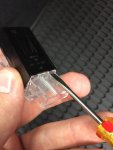
Unplug the cable from the housing (same as the driver's side). Now you will be holding the housing with the black casing. Now you must stick your flathead screwdriver into the tiny gap between the upper housing and the black casing. Carefully push in and remove the casing. On the other side, there will be two very small tabs that need to be pushed in with a good bit of force. The casing should now be removable from the housing.

Step 3 -
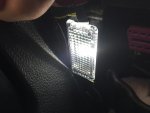
Remove the OEM LED and carefully insert the deAutoKey LED (make sure the small plastic is connected with the small holes on the LED board). Carefully put the casing back on, plug the the LED back into the cable, and push back into the original position. The passenger's side is now done!
Minorly tricky installation, but be patient and you will be rewarded with two powerful and awesome lights!
Hope this guide was helpful! Let me know if you've found a better way to do it so I can change the guide.
Driver's Side (First 3 pictures)
Step 1 -
Starting on the driver's side, locate the footwell LED. Using a flathead screwdriver (installation would be easier with the deAutoLED interior toolkit), stick the flathead into the small cutout and pop out the housing.
Step 2 -
The housing will be connected to the power supply. Carefully detach the cable by pushing in on the two small tabs on the side of the cable. Then, remove the black casing. Carefully remove the OEM LED and replace it with the deAutoKey LED.
Step 3 -
Pop the black casing back on, plug back into the cable (this will likely be difficult because of the tight spacing, but won't be as difficult if you don't have large hands like I do). Once plugged back in, pop the housing back into place. The driver side is now done.
Passenger's Side (Last 4 pictures)
Step 1 -
The housing on this side is somewhat difficult to remove, but be patient and you will get it. What I did to remove the housing was to use the head of a nail on the right most side of the housing (there will be a small notch, just like the driver's side housing). Once you've pulled enough, there will be a small gap where you will need to poke your flathead screwdriver into. Push down on this stubborn housing and it will come out.
Step 2 -
Unplug the cable from the housing (same as the driver's side). Now you will be holding the housing with the black casing. Now you must stick your flathead screwdriver into the tiny gap between the upper housing and the black casing. Carefully push in and remove the casing. On the other side, there will be two very small tabs that need to be pushed in with a good bit of force. The casing should now be removable from the housing.
Step 3 -
Remove the OEM LED and carefully insert the deAutoKey LED (make sure the small plastic is connected with the small holes on the LED board). Carefully put the casing back on, plug the the LED back into the cable, and push back into the original position. The passenger's side is now done!
Minorly tricky installation, but be patient and you will be rewarded with two powerful and awesome lights!
Hope this guide was helpful! Let me know if you've found a better way to do it so I can change the guide.
Attachments
-
 IMG_3026.jpg604.9 KB · Views: 25,006
 -
 IMG_3028.jpg282.9 KB · Views: 22,189
 -
 IMG_3029.jpg468.3 KB · Views: 22,430
 -
 IMG_3032.jpg365.7 KB · Views: 20,636
 -
 IMG_3033.jpg378.7 KB · Views: 20,201
 -
 IMG_3034.jpg362.7 KB · Views: 19,971
 -
 IMG_3035.jpg322.8 KB · Views: 19,808
Last edited: