Bäsemödel
Go Kart Champion
- Location
- Lancaster PA
Rear sway bar adventures
Yesterday I started tackling the rear sway bar. It's a straightforward swap but even so I spent s good deal of time looking at others threads and instructions from a couple different companies before jumping in.
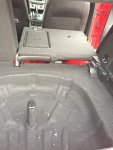
Put the car up on ramps so the suspension would remain compressed. I was unclear on wether or not this was a neccesity but I chose it over jackstands because I knew it would work and now I own a set of ramps; win win.
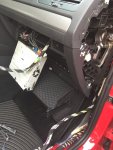
I started removing the end links from the bar and quickly found it easier to remove the end links from the LCAs inseatd. Those are 13mm bolts. With the end links free, I maneuvered the bar out of place. I didn't have to fully drop my exhaust but I was kind of determined to get it out without doing so. If you wanted it out quicker, you can drop the exhaust.
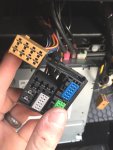
Once it was out, I started taking out the endlinks. I should have sprayed the nuts with some blaster first but I didn't think they would be as tight as they were. The M6 triple square I used was a low quality tool I guess as the points bent in (don't buy from advanced auto if you don't have to) and spun in the bolt. This caused the thin wall of the bolt to crumble.
I was much more careful on the other side and was barely able to extract the end link. After reading some more threads, I found that this isn't uncommon. The purpose of the M6 triple square is to hold the bolt in place so it doesn't rotate on you as you loosen the 16mm nut. Don't try to do it the other way. I'm sure attempt to loosen the bolt by turning the M6 while holding the nut was too much for the quality of the tool leading to its and the bolt's destruction.
I have a better set of triple square drivers on order as well as a replacement end link. It cost $49 which is a bummer but not the end of the world.
Once the end link comes in, I'll put them on the bar and get everything back together. Lesson learned! Read more threads first!


Yesterday I started tackling the rear sway bar. It's a straightforward swap but even so I spent s good deal of time looking at others threads and instructions from a couple different companies before jumping in.
Put the car up on ramps so the suspension would remain compressed. I was unclear on wether or not this was a neccesity but I chose it over jackstands because I knew it would work and now I own a set of ramps; win win.
I started removing the end links from the bar and quickly found it easier to remove the end links from the LCAs inseatd. Those are 13mm bolts. With the end links free, I maneuvered the bar out of place. I didn't have to fully drop my exhaust but I was kind of determined to get it out without doing so. If you wanted it out quicker, you can drop the exhaust.
Once it was out, I started taking out the endlinks. I should have sprayed the nuts with some blaster first but I didn't think they would be as tight as they were. The M6 triple square I used was a low quality tool I guess as the points bent in (don't buy from advanced auto if you don't have to) and spun in the bolt. This caused the thin wall of the bolt to crumble.
I was much more careful on the other side and was barely able to extract the end link. After reading some more threads, I found that this isn't uncommon. The purpose of the M6 triple square is to hold the bolt in place so it doesn't rotate on you as you loosen the 16mm nut. Don't try to do it the other way. I'm sure attempt to loosen the bolt by turning the M6 while holding the nut was too much for the quality of the tool leading to its and the bolt's destruction.
I have a better set of triple square drivers on order as well as a replacement end link. It cost $49 which is a bummer but not the end of the world.
Once the end link comes in, I'll put them on the bar and get everything back together. Lesson learned! Read more threads first!
Last edited: